浅析一下Linux上对函数进行hook的两种方式
5人参与 • 2025-06-13 • Linux
一、背景
1. 讲故事
前两篇我们介绍了 minhook 在 windows 平台上的强大功效,这一篇我们来聊一聊如何在 linux 上对函数进行hook,这里介绍两种方式。
1.轻量级的 ld_preload 拦截
ld_preload是一种共享库拦截,这种方式的优点在于不需要对源程序做任何修改,达到无侵入的功效,这是windows平台上不可想象的。
2.funchook 拦截
在 github 有很多可用于 linux 上的函数 hook,我发现轻量级的,活跃的,开源的 要属 funchook 吧。
二、两种拦截方式
1. ld_preload 如何实现拦截
要想明白 ld_preload 如何实现拦截?需要你对 linux 上的进程初始化时的链接器 ld.so 的工作过程有一个了解,简单来说就是它的加载顺序为 主程序的可执行文件 -> ld_preload 指定的库 -> glibc 标准库 -> 其他依赖库 。
由于 ld_preload 指定的 so 文件优于 glibc.so 解析,所以可以利用这种先入为主的方式覆盖后续的同名符号方法,那 ld.so 长啥样呢?在我的ubuntu上就是 ld-linux-x86-64.so.2。
root@ubuntu2404:/data2# cat /proc/5322/maps
60c0f8687000-60c0f8688000 r--p 00000000 08:03 1966089                    /data2/main
60c0f8688000-60c0f8689000 r-xp 00001000 08:03 1966089                    /data2/main
60c0f8689000-60c0f868a000 r--p 00002000 08:03 1966089                    /data2/main
60c0f868a000-60c0f868b000 r--p 00002000 08:03 1966089                    /data2/main
60c0f868b000-60c0f868c000 rw-p 00003000 08:03 1966089                    /data2/main
60c1266de000-60c1266ff000 rw-p 00000000 00:00 0                          [heap]
7efd5c600000-7efd5c628000 r--p 00000000 08:03 2242169                    /usr/lib/x86_64-linux-gnu/libc.so.6
7efd5c628000-7efd5c7b0000 r-xp 00028000 08:03 2242169                    /usr/lib/x86_64-linux-gnu/libc.so.6
7efd5c7b0000-7efd5c7ff000 r--p 001b0000 08:03 2242169                    /usr/lib/x86_64-linux-gnu/libc.so.6
7efd5c7ff000-7efd5c803000 r--p 001fe000 08:03 2242169                    /usr/lib/x86_64-linux-gnu/libc.so.6
7efd5c803000-7efd5c805000 rw-p 00202000 08:03 2242169                    /usr/lib/x86_64-linux-gnu/libc.so.6
7efd5c805000-7efd5c812000 rw-p 00000000 00:00 0
7efd5c964000-7efd5c967000 rw-p 00000000 00:00 0
7efd5c977000-7efd5c979000 rw-p 00000000 00:00 0
7efd5c979000-7efd5c97d000 r--p 00000000 00:00 0                          [vvar]
7efd5c97d000-7efd5c97f000 r-xp 00000000 00:00 0                          [vdso]
7efd5c97f000-7efd5c980000 r--p 00000000 08:03 2242166                    /usr/lib/x86_64-linux-gnu/ld-linux-x86-64.so.2
7efd5c980000-7efd5c9ab000 r-xp 00001000 08:03 2242166                    /usr/lib/x86_64-linux-gnu/ld-linux-x86-64.so.2
7efd5c9ab000-7efd5c9b5000 r--p 0002c000 08:03 2242166                    /usr/lib/x86_64-linux-gnu/ld-linux-x86-64.so.2
7efd5c9b5000-7efd5c9b7000 r--p 00036000 08:03 2242166                    /usr/lib/x86_64-linux-gnu/ld-linux-x86-64.so.2
7efd5c9b7000-7efd5c9b9000 rw-p 00038000 08:03 2242166                    /usr/lib/x86_64-linux-gnu/ld-linux-x86-64.so.2
7ffe03c95000-7ffe03cb6000 rw-p 00000000 00:00 0                          [stack]
ffffffffff600000-ffffffffff601000 --xp 00000000 00:00 0                  [vsyscall]
说了这么多,接下来我们演示下如何对 openat 进行拦截,首先定义一个 ld_preload 需要加载的共享库,代码如下:
#define _gnu_source
#include <dlfcn.h>
#include <stdio.h>
#include <fcntl.h>
#include <stdarg.h>
#include <unistd.h>
#include <sys/types.h>

static int (*real_openat)(int, const char *, int, ...) = null;

int openat(int dirfd, const char *pathname, int flags, ...)
{
    mode_t mode = 0;
    pid_t pid = getpid();
    pid_t tid = gettid();

    printf("hooked openat: pid=%d, tid=%d, path=%s\n", pid, tid, pathname);

    if (!real_openat)
    {
        real_openat = dlsym(rtld_next, "openat");
    }

    if (flags & o_creat)
    {
        return real_openat(dirfd, pathname, flags, mode);
    }
    else
    {
        return real_openat(dirfd, pathname, flags);
    }
}
将上面的 hook_openat.c 做成动态链接库,其中的 -ldl 表示对外提供加载该库的api,比如(dlopen,dlsym), 参考如下:
root@ubuntu2404:/data2# gcc -shared -fpic -o libhookopenat.so hook_openat.c -ldl
root@ubuntu2404:/data2# ls -lh
total 24k
-rw-r--r-- 1 root root 688 jun 12 09:14 hook_openat.c
-rwxr-xr-x 1 root root 16k jun 12 09:20 libhookopenat.so
-rw-r--r-- 1 root root 782 jun 12 09:18 main.c
共享库搞定之后,接下来就是写 c 代码来调用了,这里我们通过 openat 打开文件,然后让 libhookopenat.so 拦截,参考代码如下:
#define _gnu_source
#include <fcntl.h>
#include <unistd.h>
#include <stdio.h>
#include <stdlib.h>
#include <string.h>

int main()
{
    // 在当前目录下创建一个新文件
    int fd = openat(at_fdcwd, "example.txt", o_wronly | o_creat | o_trunc, 0644);
    if (fd == -1)
    {
        perror("openat failed");
        exit(exit_failure);
    }

    // 写入一些内容到文件
    const char *text = "this is a test file created with openat!\n";
    ssize_t bytes_written = write(fd, text, strlen(text));
    if (bytes_written == -1)
    {
        perror("write failed");
        close(fd);
        exit(exit_failure);
    }

    // 关闭文件
    close(fd);
    printf("file created and written successfully! wrote %zd bytes.\n", bytes_written);

    return 0;
}
root@ubuntu2404:/data2# gcc -o main ./main.c root@ubuntu2404:/data2# ld_preload=./libhookopenat.so ./main hooked openat: pid=4646, tid=4646, path=example.txt file created and written successfully! wrote 41 bytes.
从卦中可以清晰的看到 hook 成功!
2. funchook 如何实现拦截
ld_preload 这种共享库的粒度还是太大,如果粒度再小一点就更加灵活了,比如函数级,这就是本节要介绍到的 funchook,源码在github上:https://github.com/kubo/funchook ,唯一麻烦一点的就是你需要通过源码编译来生成对应的 头文件,静态链接文件,动态链接库 ,参考如下:
root@ubuntu2404:/data4# sudo apt install -y git gcc cmake make
root@ubuntu2404:/data4# git clone https://github.com/kubo/funchook.git
root@ubuntu2404:/data4# cd funchook
root@ubuntu2404:/data4# mkdir build && cd build
root@ubuntu2404:/data4# cmake ..
root@ubuntu2404:/data4# make
root@ubuntu2404:/data4/funchook/build# sudo make install
[ 25%] built target distorm
[ 42%] built target funchook-shared
[ 60%] built target funchook-static
[ 71%] built target funchook_test
[ 85%] built target funchook_test_shared
[100%] built target funchook_test_static
install the project...
-- install configuration: ""
-- installing: /usr/local/include/funchook.h
-- installing: /usr/local/lib/libfunchook.so.2.0.0
-- installing: /usr/local/lib/libfunchook.so.2
-- installing: /usr/local/lib/libfunchook.so
-- installing: /usr/local/lib/libfunchook.a

root@ubuntu2404:/data4/funchook/build# ldconfig
由于默认安装在了 /usr/local/lib 下,一定要记得用 ldconfig 命令刷新下,否则程序可能找不到新库,最后就是 c 的调用代码,参考如下:
#define _gnu_source
#include <stdio.h>
#include <dlfcn.h>
#include <fcntl.h>
#include <unistd.h>
#include <funchook.h>

// 原始函数指针
static int (*orig_openat)(int dirfd, const char *pathname, int flags, mode_t mode);

// 钩子函数
int hooked_openat(int dirfd, const char *pathname, int flags, mode_t mode)
{
    printf("hooked openat called: path=%s, flags=0x%x\n", pathname, flags);

    // 调用原始函数
    return orig_openat(dirfd, pathname, flags, mode);
}

int main()
{
    // 获取原始 openat 函数地址
    orig_openat = dlsym(rtld_next, "openat");
    if (!orig_openat)
    {
        fprintf(stderr, "failed to find openat: %s\n", dlerror());
        return 1;
    }

    // 创建 funchook 实例
    funchook_t *funchook = funchook_create();
    if (!funchook)
    {
        perror("funchook_create failed");
        return 1;
    }

    // 准备 hook
    int rv = funchook_prepare(funchook, (void **)&orig_openat, hooked_openat);
    if (rv != 0)
    {
        fprintf(stderr, "prepare failed: %s\n", funchook_error_message(funchook));
        return 1;
    }

    // 安装 hook
    rv = funchook_install(funchook, 0);
    if (rv != 0)
    {
        fprintf(stderr, "install failed: %s\n", funchook_error_message(funchook));
        return 1;
    }

    // 测试调用
    printf("=== testing openat hook ===\n");
    int fd = openat(at_fdcwd, "/etc/passwd", o_rdonly);
    if (fd >= 0)
    {
        printf("successfully opened file, fd=%d\n", fd);
        close(fd);
    }
    else
    {
        perror("openat failed");
    }

    // 清理
    funchook_uninstall(funchook, 0);
    funchook_destroy(funchook);
    return 0;
}
接下来就是编译执行了。
root@ubuntu2404:/data2# gcc -o main main.c -lfunchook -ldl
root@ubuntu2404:/data2# ./main
=== testing openat hook ===
hooked openat called: path=/etc/passwd, flags=0x0
successfully opened file, fd=3
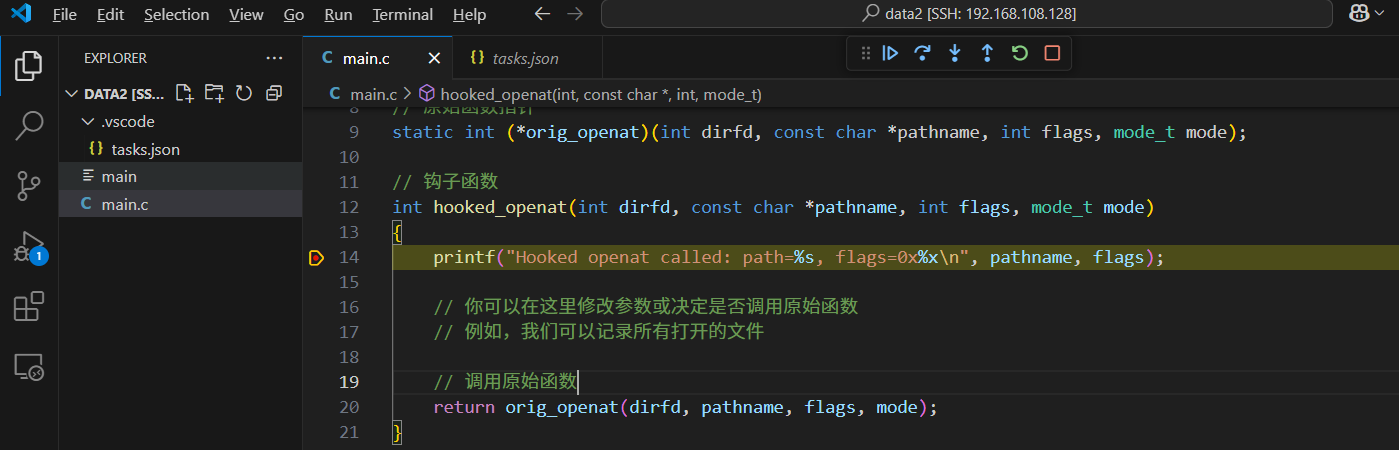
一切都是美好的,当然如果你想可视化的单步调试,可以配置到 vs 的 tasks.json 中,参考如下:
{
    "tasks": [
        {
            "type": "cppbuild",
            "label": "c/c++: gcc build active file",
            "command": "/usr/bin/gcc",
            "args": [
                "-fdiagnostics-color=always",
                "-g",
                "${file}",
                "-o",
                "${filedirname}/${filebasenamenoextension}",
                "-lfunchook",
                "-l/usr/local/lib"
            ],
            "options": {
                "cwd": "${filedirname}"
            },
            "problemmatcher": [
                "$gcc"
            ],
            "group": {
                "kind": "build",
                "isdefault": true
            },
            "detail": "task generated by debugger."
        }
    ],
    "version": "2.0.0"
}
三、总结
这里给大家总结的两种注入方式,ld_preload 虽然简单,但粒度粗,适合简单的无侵入场景,如果希望更细粒度,建议使用活跃的 funchook 吧。
到此这篇关于浅析一下linux上对函数进行hook的两种方式的文章就介绍到这了,更多相关linux函数hook内容请搜索代码网以前的文章或继续浏览下面的相关文章希望大家以后多多支持代码网!
赞 (0)
您想发表意见!!点此发布评论


发表评论