Nginx安装和配置过程(yum安装和编译安装)
324人参与 • 2025-07-03 • 阿里
1. yum 安装 nginx
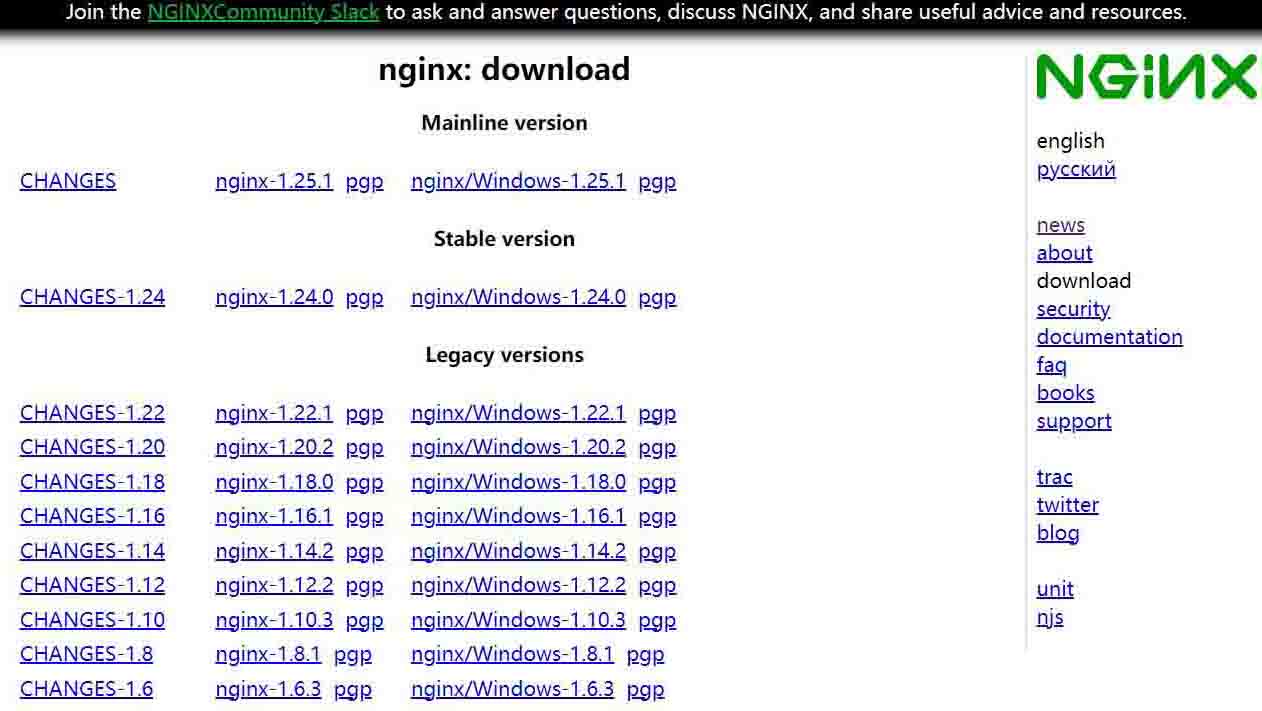
nginx的官方网站:http://www.nginx.org
nginx版本类型
- mainline version:主线版,即开发版
- stable version:最新稳定版,生产环境上建议使用的版本
- legacy versions:遗留的老版本的稳定版
yum安装nginx
配置yum源的官网:http://nginx.org/en/linux_packages.html
1.1. 配置 nginx 的 yum 源
安装说明:
在新计算机上首次安装nginx之前,需要设置nginx软件包存储库。 之后,您可以从存储库安装和更新nginx。
要设置yum存储库,请创建名为/etc/yum.repos.d/nginx.repo的文件,其中包含以下内容:
//安装yum工具包
[root@localhost ~]# yum -y install yum-utils
[root@localhost ~]# vim /etc/yum.repos.d/nginx.repo
[nginx-stable]
name=nginx stable repo
baseurl=http://nginx.org/packages/centos/$releasever/$basearch/
gpgcheck=1
enabled=1
gpgkey=https://nginx.org/keys/nginx_signing.key
module_hotfixes=true

[nginx-mainline]
name=nginx mainline repo
baseurl=http://nginx.org/packages/mainline/centos/$releasever/$basearch/
gpgcheck=1
enabled=0
gpgkey=https://nginx.org/keys/nginx_signing.key
module_hotfixes=true
1.2. 安装 nginx
这里我们用稳定版本
[root@localhost ~]# yum install -y nginx [root@localhost ~]# nginx -v //查看nginx的详细信息,包括模块,安装目录、用户等 nginx version: nginx/1.24.0 built by gcc 4.8.5 20150623 (red hat 4.8.5-44) (gcc) built with openssl 1.0.2k-fips 26 jan 2017 tls sni support enabled configure arguments: --prefix=/etc/nginx --sbin-path=/usr/sbin/nginx --modules-path=/usr/lib64/nginx/modules --conf-path=/etc/nginx/nginx.conf --error-log-path=/var/log/nginx/error.log --http-log-path=/var/log/nginx/access.log --pid-path=/var/run/nginx.pid --lock-path=/var/run/nginx.lock --http-client-body-temp-path=/var/cache/nginx/client_temp --http-proxy-temp-path=/var/cache/nginx/proxy_temp --http-fastcgi-temp-path=/var/cache/nginx/fastcgi_temp --http-uwsgi-temp-path=/var/cache/nginx/uwsgi_temp --http-scgi-temp-path=/var/cache/nginx/scgi_temp --user=nginx --group=nginx --with-compat --with-file-aio --with-threads --with-http_addition_module --with-http_auth_request_module --with-http_dav_module --with-http_flv_module --with-http_gunzip_module --with-http_gzip_static_module --with-http_mp4_module --with-http_random_index_module --with-http_realip_module --with-http_secure_link_module --with-http_slice_module --with-http_ssl_module --with-http_stub_status_module --with-http_sub_module --with-http_v2_module --with-mail --with-mail_ssl_module --with-stream --with-stream_realip_module --with-stream_ssl_module --with-stream_ssl_preread_module --with-cc-opt='-o2 -g -pipe -wall -wp,-d_fortify_source=2 -fexceptions -fstack-protector-strong --param=ssp-buffer-size=4 -grecord-gcc-switches -m64 -mtune=generic -fpic' --with-ld-opt='-wl,-z,relro -wl,-z,now -pie' [root@localhost ~]# nginx -v //查看版本号 nginx version: nginx/1.24.0 //关闭防火墙和selinux [root@localhost ~]# getenforce enforcing [root@localhost ~]# setenforce 0 [root@localhost ~]# sed -i '/selinux/s/enforcing/disabled/' /etc/selinux/config [root@localhost ~]# systemctl stop firewalld [root@localhost ~]# systemctl disable firewalld //启动并设置开机启动 [root@localhost ~]# systemctl start nginx [root@localhost ~]# systemctl enable nginx
浏览器输入ip访问:

2. nginx 编译安装与配置使用
2.1. 安装编译环境
[root@localhost ~]# yum -y install gcc gcc-c++ pcre pcre-devel gd-devel openssl openssl-devel zlib zlib-devel
2.2. 创建用户nginx
[root@localhost ~]# useradd nginx && echo "nginx" | passwd --stdin nginx
2.3. 安装 nginx
[root@localhost ~]# rpm -qa|grep wget && wget http://nginx.org/download/nginx-1.24.0.tar.gz
[root@localhost ~]# mkdir -p /tmp/nginx/
[root@localhost ~]# tar -xzvf nginx-1.24.0.tar.gz -c /usr/local/
[root@localhost ~]# cd /usr/local/nginx-1.24.0/
[root@localhost nginx-1.24.0]# ./configure --prefix=/usr/local/nginx --user=nginx --sbin-path=/usr/local/nginx/sbin/nginx --conf-path=/etc/nginx/nginx.conf --error-log-path=/var/log/nginx/error.log --http-log-path=/var/log/nginx/access.log --http-client-body-temp-path=/tmp/nginx/client_body --http-proxy-temp-path=/tmp/nginx/proxy --http-fastcgi-temp-path=/tmp/nginx/fastcgi --pid-path=/var/run/nginx.pid --lock-path=/var/lock/nginx --with-http_stub_status_module --with-http_ssl_module --with-http_gzip_static_module --with-pcre --with-http_realip_module --with-stream
[root@localhost nginx-1.24.0]# make && make install
2.4. nginx 编译参数详解
--prefix=/usr/local/nginx ##指向安装目录 --conf-path=/etc/nginx/nginx.conf ##指定配置文件 --http-log-path=/var/log/nginx/access.log ##指定访问日志 --error-log-path=/var/log/nginx/error.log ##指定错误日志 --lock-path=/var/lock/nginx.lock ##指定lock文件(进程锁文件路径)nginx进程锁(lock file)是用于控制nginx进程并发性的一种机制。在nginx启动时,会创建一个进程锁文件,用于记录nginx主进程的pid,并避免多个nginx进程同时运行。 --pid-path=/run/nginx.pid ##指定pid文件 --http-client-body-temp-path=/var/lib/nginx/body ##设定http客户端请求临时文件路径(客户端请求体临时文件路径) #作用:http客户端请求体临时文件用于存储客户端请求体的临时数据,通常情况下,当客户端上传的数据比较大时,nginx会将请求体存储在临时文件中,以避免内存不足的问题 --http-fastcgi-temp-path=/var/lib/nginx/fastcgi ##设定http fastcgi临时文件路径(用于设置fastcgi临时文件路径) #fastcgi是一种web服务器和应用程序之间通信的协议,它可以用于将动态生成的web页面的生成过程交给独立的fastcgi进程处理,从而提高web服务器的性能和可靠性。在处理fastcgi请求时,nginx会使用fastcgi临时文件来存储和传递fastcgi进程生成的数据。 --http-proxy-temp-path=/var/lib/nginx/proxy ##设定http代理临时文件路径(用于设置代理模块临时文件路径) #代理模块是nginx中的一个核心模块,用于将客户端的请求转发到后端服务器,并将后端服务器的响应返回给客户端。在处理代理请求时,nginx会使用代理模块临时文件来存储和传递代理请求的数据。 --http-scgi-temp-path=/var/lib/nginx/scgi ##设定http scgi模块临时路径(用于设置scgi(simple common gateway interface)模块临时文件路径) #scgi是一种web服务器和应用程序之间通信的协议,类似于fastcgi。在处理scgi请求时,nginx会使用scgi模块临时文件来存储和传递scgi进程生成的数据。 --http-uwsgi-temp-path=/var/lib/nginx/uwsgi ##设定http uwsgi临时文件路径(用于设置uwsgi(universal web server gateway interface)模块临时文件路径) #uwsgi是一种web服务器和应用程序之间通信的协议,类似于fastcgi和scgi。在处理uwsgi请求时,nginx会使用uwsgi模块临时文件来存储和传递uwsgi进程生成的数据。 --with-debug #启用调试日志信息,用于调试和排查问题。 --with-ipv6 #启用ipv6支持。 --with-http_ssl_module #启用https协议支持的ssl/tls模块。 --with-http_stub_status_module #启用nginx自上次启动以来的状态信息模块,可以通过http接口获取。 --with-http_realip_module #允许从请求头中更改客户端的ip地址值,用于反向代理等场景,默认为关闭状态。 --with-http_auth_request_module #实现基于子请求结果的客户端授权,如果子请求返回2xx响应代码,则允许访问;如果返回401或403响应代码,则拒绝访问;其他响应代码则视为错误。 --with-http_addition_module #作为一个输出过滤器,支持不完全缓冲、分部分响应请求。 --with-http_dav_module #增加put、delete、mkcol、copy和move方法,用于webdav协议支持,默认为关闭状态,需要编译开启。 --with-http_geoip_module #使用预编译的maxmind数据库解析客户端ip地址,得到变量值。 --with-http_gunzip_module #用于解压具有“content-encoding: gzip”头的响应,以支持不支持“gzip”编码方法的客户端。 --with-http_gzip_static_module #在线实时压缩输出数据流,以降低网络带宽消耗。 --with-http_spdy_module #启用spdy协议支持,可以缩短网页的加载时间。 --with-http_sub_module #允许在nginx响应中用一些其他文本替换指定的文本,用于文本替换和重定向等场景。 --with-http_xslt_module #用于过滤和转换xml请求。 --with-mail #启用pop3/imap4/smtp代理模块支持。 --with-mail_ssl_module #启用ngx_mail_ssl_module支持,用于支持ssl/tls加密的smtp/pop3/imap4协议。 #这些选项可以根据具体需求进行选择和配置,以满足不同的应用场景。需要注意的是,一些模块默认是关闭的,需要通过编译时的选项进行开启。同时,这些选项需要在编译nginx之前进行设置。 --with 表示在编译过程中需要给nginx添加的模块 --without 表示编译nginx时默认该模块是添加进去的当使用这个参数时表示将默认编译的模块移除
//查看 nginx 安装的模块 [root@localhost ~]# /usr/local/nginx/sbin/nginx -v nginx version: nginx/1.24.0 built by gcc 4.8.5 20150623 (red hat 4.8.5-44) (gcc) built with openssl 1.0.2k-fips 26 jan 2017 tls sni support enabled configure arguments: --prefix=/usr/local/nginx --user=nginx --sbin-path=/usr/local/nginx/sbin/nginx --conf-path=/etc/nginx/nginx.conf --error-log-path=/var/log/nginx/error.log --http-log-path=/var/log/nginx/access.log --http-client-body-temp-path=/tmp/nginx/client_body --http-proxy-temp-path=/tmp/nginx/proxy --http-fastcgi-temp-path=/tmp/nginx/fastcgi --pid-path=/var/run/nginx.pid --lock-path=/var/lock/nginx --with-http_stub_status_module --with-http_ssl_module --with-http_gzip_static_module --with-pcre --with-http_realip_module --with-stream //只查看版本号 [root@localhost ~]# /usr/local/nginx/sbin/nginx -v nginx version: nginx/1.24.0
2.5. 修改配置文件/etc/nginx/nginx.conf
[root@localhost ~]# cd /etc/nginx/
[root@localhost nginx]# ls
fastcgi.conf            koi-utf             nginx.conf           uwsgi_params
fastcgi.conf.default    koi-win             nginx.conf.default   uwsgi_params.default
fastcgi_params          mime.types          scgi_params          win-utf
fastcgi_params.default  mime.types.default  scgi_params.default
[root@localhost nginx]# cp nginx.conf{,.bak}
[root@localhost nginx]# vim nginx.conf
# 全局参数设置
user nginx; #设置nginx使用的用户
worker_processes 4; #设置nginx启动进程的数量,一般设置成与逻辑cpu数量相同
error_log logs/error.log; #指定错误日志
pid /var/run/nginx.pid;
events {
worker_connections 1024; #设置一个进程的最大并发连接数
}
# http 服务相关设置
http {
include mime.types; #关联mime类型,关联资源的媒体类型
default_type application/octet-stream; #根据文件的后缀来匹配相应的mime类型
log_format main 'remote_addr - remote_user [time_local] "request" '
'status body_bytes_sent "$http_referer" '
'"http_user_agent" "http_x_forwarded_for"';
#这一段是nginx的日志格式配置,这一小段忽略:
remote_addr:客户端ip地址。
remote_user:客户端用户名。
[time_local]:访问时间,格式为本地时间。
"request":http请求方法、uri和协议版本。
status:http响应状态码。
body_bytes_sent:发送给客户端的数据量,不包括响应头。
"$http_referer":http referer头信息,表示访问来源。
"http_user_agent":http user-agent头信息,表示客户端浏览器或应用程序的信息。
"http_x_forwarded_for":http x-forwarded-for头信息,表示客户端真实ip地址,用于反向代理场景。
access_log /var/log/nginx/access.log main; #设置访问日志的位置和格式
sendfile on; # 用于开启文件高效传输模式,一般设置为on,若nginx是用来进行磁盘io负载应用时,可以设置为off,降低系统负载
tcp_nopush on; # 减少网络报文段数量,当有数据时,先别着急发送,确保数据包已经装满数据,避免了网络拥塞
tcp_nodelay on; # 提高i/o性能,禁用nagle算法,确保数据尽快发送,提高可数据传输效率 (nagle算法是一种常用的tcp网络传输优化算法,它将多个小的数据包合并成一个大的数据包发送,以减少网络传输的开销)
gzip on; #是否开启gzip压缩,将注释去掉开启
keepalive_timeout 65; #设置长连接的超时时间,即:请求完成之后还要保持连接多久
# 虚拟服务器的相关设置
server {
listen 80; #设置监听的端口
server_name localhost; #设置绑定的主机名、域名或ip地址
charset koi8-r; # 设置编码字符
location / {
root /var/www/nginx; #设置服务器默认网站的根目录位置,需要手动创建
index index.html index.htm; #设置默认打开的文档
}
error_page 500 502 503 504 /50x.html; #设置错误信息返回页面
location = /50x.html {
root html; #这里的绝对位置是/usr/local/nginx/html
}
}
}
1、nginx.conf的组成:
- nginx.conf一共由三部分组成,分别为:全局块、events块、http块。在http块中又包含http全局块、多个server块。
- 每个server块中又包含server全局块以及多个location块。在统一配置块中嵌套的配置快,各个之间不存在次序关系。
2、nginx的组成:
- nginx的二进制可执行文件:用来启动关闭nginx的,由各个模块编译出来的
#—/usr/local/nginx/sbin/nginx
- nginx.conf配置文件:控制nginx
- access.log访问日志:记录每条http请求
- error.log 错误日志:定位问题
2.6. 检测 nginx 配置文件是否正确
[root@localhost nginx]# /usr/local/nginx/sbin/nginx -t //最简单的方法让服务器全局都能使用nginx命令 [root@localhost nginx]# ln -s /usr/local/nginx/sbin/nginx /usr/sbin/nginx #注意一定要是绝对路径!!! [root@localhost nginx]# nginx -t nginx: the configuration file /etc/nginx/nginx.conf syntax is ok nginx: configuration file /etc/nginx/nginx.conf test is successful
2.7. 启动 nginx 服务
[root@localhost ~]# /usr/local/nginx/sbin/nginx
//或者直接 nginx
2.8. 通过 nginx 命令控制 nginx 服务
nginx -c /path/nginx.conf  -     # 以特定目录下的配置文件启动nginx
nginx -s reload                  # 修改配置后重新加载生效
nginx -s stop                    # 快速停止nginx
nginx -s quit                    # 正常停止nginx
nginx -t                         # 测试当前配置文件是否正确
nginx -t -c /path/to/nginx.conf  # 测试特定的nginx配置文件是否正确
注意:
nginx -s reload 命令加载修改后的配置文件,命令下达后发生如下事件:
- 1.nginx的master进程检查配置文件的正确性,若是错误则返回错误信息,nginx继续采用原配置文件进行工作(因为worker未受到影响)
- 2.如果配置文件没问题,则nginx会启动新的worker进程,并且采用新的配置文件
- 3.nginx将新的请求分配新的worker进程
- 4.nginx等待以前的worker进程的全部请求已经都返回后,关闭相关worker进程
- 5.重复上面过程,直到全部旧的worker进程都被关闭掉
3. nginx 日志文件详解
- nginx 日志文件分为 log_format 和 access_log 两部分
- log_format 定义记录的格式,其语法格式为:
# log_format 样式名称 样式详情
配置文件中默认有,编译安装的nginx默认是关闭该格式的
log_format  main  'remote_addr - remote_user [time_local] "request" '
                  'status body_bytes_sent "$http_referer" '
                  '"http_user_agent" "http_x_forwarded_for"';
参数解释
| 变量 | 说明 |
|---|---|
| remote_addr | 客户端ip地址 |
| remote_user | 客户端用户名 |
| [time_local] | 访问时间,格式为本地时间 |
| “request” | http请求方法、uri和协议版本 |
| status | http响应状态码 |
| body_bytes_sent | 发送给客户端的数据量,不包括响应头 |
| “$http_referer” | http referer头信息,表示访问来源 |
| “http_user_agent” | http user-agent头信息,表示客户端浏览器或应用程序的信息 |
| “http_x_forwarded_for” | http x-forwarded-for头信息,表示客户端真实ip地址,用于反向代理场景 |
总结
以上为个人经验,希望能给大家一个参考,也希望大家多多支持代码网。
赞 (0)
您想发表意见!!点此发布评论


发表评论