jdk8升级到jdk11如何升级的真实案例(亲身经历)
37人参与 • 2025-10-03 • 其他编程
一、背景
为什么要升级jdk11
性能
- jdk11的g1的gc性能高很多,对比jdk8无论是性能还是内存占比都有很大的提升,业内各项数据指标也都表明jdk11的g1在应对突发流量的下的效果惊人;

- 版本兼容
- spring boot 2.7.x及以后的版本将不再支持java 8作为最低版本。spring boot 2.6.x是最后一个正式支持java 8的主线版本,一些新的中间件与组件也不再支持jdk8了;
- 必然趋势
- jdk11(lts)已经成为业界主流,在java开发社区和工业界中得到了广泛的接受和使用;

二、升级前你要知道的点
- jdk11版本改动较大,且不会向下兼容。所以当你的业务代码越复杂,调用的链路越多,升级的难度越大。你会遇到很多兼容性问题,比如 二方包不支持新版本jdk;
- jdk11移除了部分在java 8就已经标记为过时的api例如sun.misc.unsafe的部分方法,所以你的升级可能还涉及到代码的改动;
- 验证是个漫长而又耗时的过程,很多问题可能在运行时阶段才会暴露,你需要验证系统整体功能来保证系统稳定;
三、升级过程
本地升级,让你的jdk11跑起来
- 本地jdk11下载
这里不过多阐述,需要注意区分jdk的arm版本与x64版本。
- idea选择jdk11启动

- 框架升级
修改pom文件
<maven.compiler.target>11</maven.compiler.target>
<maven.compiler.source>11</maven.compiler.source>
<java.version>11</java.version>
<spring-boot.version>2.1.6.release</spring-boot.version>
<lombok.version>1.18.12</lombok.version>
软件 | 最低版本 |
spring-boot | 2.1.x 开始支持jdk11 |
spring | 5.1.x |
idea | 2018.2 |
maven | 3.5.0 |
lombok | 1.18.x |
netty | 需要升级到 4.1.33.final 或之后的版本,否则会引起堆外内存增长 |
apache common lang3 | 3.12.0 |
jdk11已移除,需手工依赖二方库
<dependency>
    <groupid>javax.xml.soap</groupid>
    <artifactid>javax.xml.soap-api</artifactid>
    <version>1.4.0</version>
</dependency>
<dependency>
    <groupid></groupid>
    <artifactid>jaxws-ri</artifactid>
    <version>2.3.3</version>
    <type>pom</type>
</dependency>
<dependency>
    <groupid>com.sun.xml.bind</groupid>
    <artifactid>jaxb-impl</artifactid>
    <version>2.3.0</version>
</dependency>
<dependency>
    <groupid>javax.xml.bind</groupid>
    <artifactid>jaxb-api</artifactid>
    <version>2.3.0</version>
</dependency>
<dependency>
    <groupid>javax.annotation</groupid>
    <artifactid>javax.annotation-api</artifactid>
    <version>1.3.2</version>
</dependency>
<dependency>
    <groupid>com.sun.activation</groupid>
    <artifactid>javax.activation</artifactid>
    <version>1.2.0</version>
</dependency>
<dependency>
    <groupid>com.sun.xml.bind</groupid>
    <artifactid>jaxb-core</artifactid>
    <version>2.3.0</version>
</dependency>
<dependency>
    <groupid>com.alibaba.jvm</groupid>
    <artifactid>java-migration-jdk-patch</artifactid>
    <version>0.3.1</version>
    <type>pom</type>
</dependency>
<dependency>
    <groupid>javax.transaction</groupid>
    <artifactid>javax.transaction-api</artifactid>
    <version>1.2</version>
</dependency>- 遇到的问题
deprecated: a global security auto-configuration is now provided

在spring boot 2.0及以上版本中,这个配置项已经被废弃并移除。如果你要关闭端点的安全性,需要在spring security的配置中对actuator端点进行配置。该配置项是默认开启安全检测。
dependency 'org.hibernate:hibernate-validator:' not found

需要指定版本号
<dependency>
    <groupid>org.hibernate</groupid>
    <artifactid>hibernate-validator</artifactid>
    <version>6.2.4.final</version>
</dependency>
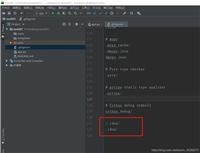
应用不能进行远程调试
原因分析
jdk 8 中 jdwp 默认绑定的 host/ip 是 0.0.0.0,初于安全考虑在 jdk 9 后改成了 localhost(127.0.0.1),导出如果开发者在配置调试选项时只指定端口时,在升级后无法进行远程调试。
解决方案
指定调试选项时设置 host/ip 为 *,如:
agentlib:jdwp=transport=dt_socket,server=y,suspend=n,address=*:8000
或者 0.0.0.0,如:
agentlib:jdwp=transport=dt_socket,server=y,suspend=n,address=0.0.0.0:8000
其他问题
1、maven-compiler-plugin:此插件建议直接升级到最新版,同时在父pom和每个你需要额外确定版本的包(比如说打给别人用的jdk8版本的包)里的pom,指定版本:
<maven.compiler.source>11</maven.compiler.source> <maven.compiler.target>11</maven.compiler.target>
2、springboot和spring版本:spring从5.1开始支持11,springboot从2.1.x开始支持11,我们的推荐是支持升级到当前的最新版;
3、netty因为堆外内存的释放问题,请升级到4.1.33以上的版本;
4、lombok因为会在编译期插入自己的编译逻辑,所以升级到11之后,需要将lombok升级到最新版,(编辑文档时的最新版本是1.18.24);
5、可能大部分应用都需要进行spring或者springboot升级,请务必做好回归;
6、security-spring-boot-starter分为1.x.x和2.x.x版本,对应springboot1和springboot2,请升级到2.x.x版本;
应用部署发布
- 使用g1垃圾回收器
去除
#service_opts="${service_opts} -xx:+useconcmarksweepgc -xx:+usecmscompactatfullcollection -xx:cmsmaxabortableprecleantime=5000"
#service_opts="${service_opts} -xx:+cmsclassunloadingenabled -xx:cmsinitiatingoccupancyfractinotallow=80 -xx:+usecmsinitiatingoccupancyonly"
#service_opts="${service_opts} -xx:+explicitgcinvokesconcurrent -dsun.rmi.dgc.server.gcinterval=2592000000 -dsun.rmi.dgc.client.gcinterval=2592000000"
#service_opts="${service_opts} -xx:parallelgcthreads=4"
#service_opts="${service_opts} -xloggc:${middleware_logs}/gc.log -xx:+printgcdetails -xx:+printgcdatestamps"


service_opts="${service_opts} -xx:+useg1gc -xx:+usevtablebasedcha -xx:+usecompactobjectheaders"
service_opts="${service_opts} -xx:g1heapreginotallow=8m"
service_opts="${service_opts} -xx:+g1barrierskipdcq"
service_opts="${service_opts} -xlog:gc*:/home/admin/logs/gc.log:time"
service_opts="${service_opts} -xx:g1heapwastepercent=2"
service_opts="${service_opts} -xx:+explicitgcinvokesconcurrent -dsun.rmi.dgc.server.gcinterval=2592000000 -dsun.rmi.dgc.client.gcinterval=2592000000"
if [ -n "$ajdk_max_processors_limit" ]; then
    service_opts="${service_opts} -xx:activeprocessorcount=$ajdk_max_processors_limit"
fi
gc调优的注意事项(数据来源jvm团队)
通常g1 gc是一个免调参的gc,并不需要额外的参数调整。老的一些的八股文java gc调参经验并不适用。
-xmn参数一般不需要设置
g1预设了-xx:newsize和-xx:maxnewsize的值(不一致),会根据实际运行来计算设置每次gc的young区的size,实现gc暂停的软可控。
-xx:newratio同理不需要设置
-xx:survivorratio一般也不设置
通常绝大部分使用者并不清楚这个参数的含义以及对gc带来的影响,g1会自适应处理这个参数相关的gc行为。
升级g1后可能需要关注的参数
-xx:maxgcpausemillis=n,g1暂停的目标时间(毫秒)
默认为200,很多用户会刻意设小,通常情况下意义不大。g1实际的gc暂停任务,并不会随着暂停时间缩小而变少,可以设小会导致更频繁的gc影响吞吐。一般不需要设置,如果需要更好的吞吐,通常是设置更大,保持young区不会缩减的太小。也可以咨询jvm答疑专家考虑调整-xx:newsize和-xx:maxnewsize,来保持young 区的size,维持合适的吞吐性能。
-xx:initiatingheapoccupancypercent=n -xx:-g1useadaptiveihop (电商核心使用)
这两个参数通常同时使用。jdk11引入了g1useadaptiveihop来提升老区的利用率(大堆,通常大几十g,或者100g以上)。在我们容器规格中等规模的heap(通常5-20g)的size中,有时会出现old gc过于频繁或者young gc过于频繁的现象。因此考虑一个合适的静态ihop(老区使用占全堆比例触发gc的阈值),会更加合适。
-xx:g1heapregionsize,(电商核心通常使用8m-32m)
设置g1 region的大小,应对humongous对象(超过heap region size一半独占一个或多个region)引起的gc异常。heap region size默认为heap size/2048,如果默认值过小,humongous对象分配过多,容易引起to-space exhausted的异常暂停时间:
[2024-01-05t14:14:31.817+0800] gc(266) to-space exhausted
-xx:g1heapwastepercent,(默认5,部分电商核心应用设置为2)
g1在回收老区对象时,可以允许5% heap size的垃圾对象不回收,来减少mixed gc的暂停开销。当xmx10g时,5%就有500m的空间,对于java heap是一种浪费,因此可以考虑减少heap空间浪费设置成2。不建议设置成0,可能会极大增加mixed gc的暂停。
-xx:g1mixedgccounttarget,mixed gc目标次数,默认为8
实际的mixed gc次数通常会小于g1mixedgccounttarget,如果concurrent mark/mixed gc的周期并不频繁,单次mixed gc的暂停过长,通常可以考虑增大这个参数,例如16,来分散单次mixed gc暂停的工作量,减少暂停时间。
升级g1的常见问题
cms升级g1后,容器和java进程内存占用变高
很多应用在升级jdk11,出现容器和java进程内存整体变高的现象,主要源自heap的使用率差异。cms的old generation为非移动式,由 cmsinitiatingoccupancyfraction 来控制使用比例来触发gc,因此应用启动后短时间内,heap old区使用率不会上升。而g1的heap region是松散管理,整体利用heap,所以显得内存使用率高。本质是一个heap利用率的问题,cms初始留着部分heap不用。这个问题可以通过调低xmx来解决(部分电商核心使用这个方案)。
gc日志中to-space exhausted引起的异常暂停
绝大部分是由于大对象分配过多,gc日志中频繁出现
pause young (concurrent start) (g1 humongous allocation)
大对象分配过多,会导致堆空间快速被占满,gc是出现to-space exhausted/evacuation failure,需要额外的暂停时间处理,甚至出现更耗时的full gc全堆整理。
gc过于频繁
相比传统的cms/parallel gc,固定的young 区size。g1的young区size是自动调整的,当为了满足暂停要求时,会缩小young区,导致gc频率过高。一般的情况是避免maxgcpausemillis设置过小,参考上面参数的介绍。或者增大maxgcpausemillis的配置,同时有必要的话咨询答疑专家,调整-xx:newsize和-xx:maxnewsize。
mixed gc暂停过长
g1除了整理清除young区对象的young gc,还有在concurrent mark之后,包含整理老区对象的mixed gc。因此通常mixed gc会有更长的暂停时间。如果单次mixed gc暂停过长,考虑增大上面介绍的参数g1mixedgccounttarget,来进一步分散老区对象整理的任务,降低暂停
四、升级效果
日常运行

可以看到在日常运行中,g1的垃圾回收耗时也有不错的提升
压测效果
相同压测条件下tps20


可以明显看到gc耗时降低了不少,速度快了70%左右

线上运行情况

从图中可以看到ygc的耗时明显缩短,性能将近提升50%!这归功于分代收集的能力
ygc平均暂停时间 | ygc次数 | 效果 | |
jdk8+cms | 7.4ms | 10347 | |
jdk11+g1 | 3.74ms | 10649 | 性能提升49.5% |
五、jdk11新玩法
字符串string加强
string str = " i am lzc ";
boolean isblank = str.isblank();         //判断字符串是空白
boolean isempty = str.isempty();         //判断字符串是否为空
string  result1 = str.strip();           //首位空白
string  result2 = str.striptrailing();  //去除尾部空白
string  result3 = str.stripleading();   //去除首部空白
string  copystr = str.repeat(2);        //复制几遍字符串
long  linecount = str.lines().count();  //行数统计


system.out.println(isblank);            //结果:false
system.out.println(isempty);            //结果:false
system.out.println(result1);            //结果:i am lzc
system.out.println(result2);            //结果: i am lzc
system.out.println(result3);            //结果:i am lzc
system.out.println(copystr);            //结果: i am lzc  i am lzc
system.out.println(linecount);          //结果:1
文件files方法加强
path filepath = files.writestring(path.of("/temp/a.txt"), "sample text");
string filecontent = files.readstring(filepath);
system.out.println(filecontent.equals("sample text"));
数据流stream方法加强
//stream,允许接受一个null值,计算count时,返回0
long count = stream.ofnullable(null).count();
system.out.println(count); // 0


//方法都接受一个谓词来决定从流中放弃哪些元素
//通俗理解:从集合中删除满足条件的元素,直到不满足为止
list list1 = stream.of(1, 2, 3, 2, 1)
        .dropwhile(n -> n < 3)
        .collect(collectors.tolist());
system.out.println(list1); // [3, 2, 1]


//方法都接受一个谓词来决定从流中选用哪些元素
//通俗理解:从集合中提取满足条件的元素,直到不满足为止
list list2 = stream.of(1, 2, 3, 2, 1)
        .takewhile(n -> n < 3)
        .collect(collectors.tolist());
system.out.println(list2); // [1, 2]
集合list、map等方法加强
list list1 = list.of(1, 3, 5, 7);
list list2 = list.copyof(list1);
system.out.println(list2); //结果: [1,3,5,7]


map<integer, string> map1 = map.of(1, "a", 2, "b", 3, "c");
map<integer, string> map2 = map.copyof(map1);
system.out.println(map2); //结果: {1=a, 2=b, 3=c}
optional加强
//新增orelsethrow,为空时抛异常
object v2 = optional.ofnullable(null).orelsethrow();      //结果:抛异常


//新增ifpresentorelse,不为null执行第1个回调函数,为null时执行第2个回调函数
optional.ofnullable(null).ifpresentorelse(
        (x) -> {
            system.out.println("数据:" + x);
        }, () -> {
            system.out.println("数据不存在");
        });


//提供另一个optionals 作为空optionals的回调
object v3 = optional.ofnullable(null)
        .or(() -> optional.of("fallback"))
        .get();   //结果:fallback
system.out.println(v3);
http client
httpclient client = httpclient.newhttpclient();
httprequest request = httprequest.newbuilder()
    .uri(uri.create(uri))
    .build();
// 异步
client.sendasync(request, httpresponse.bodyhandlers.ofstring())
    .thenapply(httpresponse::body)
    .thenaccept(system.out::println)
    .join();


// 同步
httpresponse<string> response = client.send(request, httpresponse.bodyhandlers.ofstring());
system.out.println(response.body());六、常见问题解决
- jvm参数调整:移除
-xverify等废弃参数,替换为--add-opens解决模块访问限制。 - 类路径冲突:jdk 11默认不包含
javax.xml等包,需显式添加依赖(如--add-modules=jdk.xml.dom)。
七、总结
升级后需全面回归测试,建议先在非生产环境验证。建议使用jdeprscan:检测废弃api。
到此这篇关于jdk8升级到jdk11如何升级的真实案例(亲身经历)的文章就介绍到这了,更多相关jdk8升级到jdk11内容请搜索代码网以前的文章或继续浏览下面的相关文章希望大家以后多多支持代码网!
您想发表意见!!点此发布评论


发表评论