
matplotlib绘制多图技巧:subplot和subplots方法哪个更好用
104人参与 • 2026-09-29 • Linux
matplotlib 绘制多图
我们可以使用 pyplot 中的 subplot() 和 subplots() 方法来绘制多个子图。
subplot() 方法在绘图时需要指定位置,subplots() 方法可以一次生成多个,在调用时只需要调用生成对象的 ax 即可。
subplot
subplot(nrows, ncols, index, **kwargs)
subplot(pos, **kwargs)
subplot(**kwargs)
subplot(ax)
以上函数将整个绘图区域分成 nrows 行和 ncols 列,然后从左到右,从上到下的顺序对每个子区域进行编号 1...n ,左上的子区域的编号为 1、右下的区域编号为 n,编号可以通过参数 index 来设置。
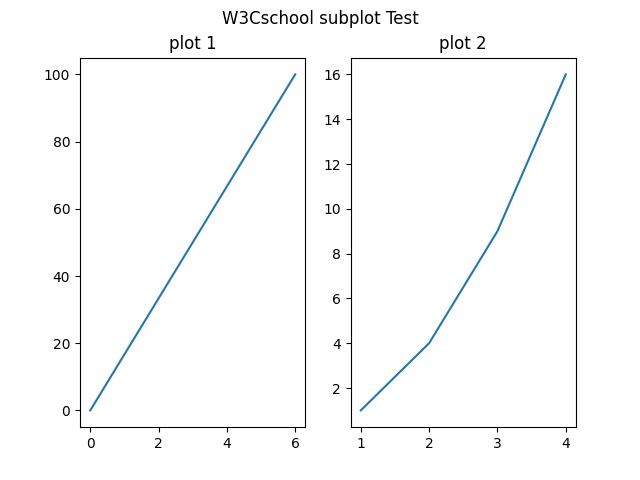
设置 numrows = 1,numcols = 2,就是将图表绘制成 1x2 的图片区域,对应的坐标为:
(1, 1), (1, 2)
plotnum = 1, 表示的坐标为(1, 1), 即第一行第一列的子图。
plotnum = 2, 表示的坐标为(1, 2), 即第一行第二列的子图。
实例
import matplotlib.pyplot as plt
import numpy as np
#plot 1:
xpoints = np.array([0, 6])
ypoints = np.array([0, 100])
plt.subplot(1, 2, 1)
plt.plot(xpoints,ypoints)
plt.title("plot 1")
#plot 2:
x = np.array([1, 2, 3, 4])
y = np.array([1, 4, 9, 16])
plt.subplot(1, 2, 2)
plt.plot(x,y)
plt.title("plot 2")
plt.suptitle("w3cschool subplot test")
plt.show()
显示结果如下:
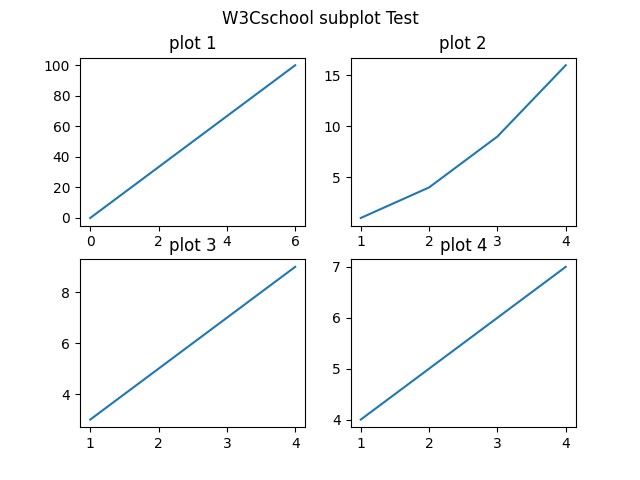
设置 numrows = 2,numcols = 2,就是将图表绘制成 2x2 的图片区域, 对应的坐标为:
(1, 1), (1, 2)
(2, 1), (2, 2)
- plotnum = 1, 表示的坐标为(1, 1), 即第一行第一列的子图。
- plotnum = 2, 表示的坐标为(1, 2), 即第一行第二列的子图。
- plotnum = 3, 表示的坐标为(2, 1), 即第二行第一列的子图。
- plotnum = 4, 表示的坐标为(2, 2), 即第二行第二列的子图。
实例
import matplotlib.pyplot as plt
import numpy as np
#plot 1:
x = np.array([0, 6])
y = np.array([0, 100])
plt.subplot(2, 2, 1)
plt.plot(x,y)
plt.title("plot 1")
#plot 2:
x = np.array([1, 2, 3, 4])
y = np.array([1, 4, 9, 16])
plt.subplot(2, 2, 2)
plt.plot(x,y)
plt.title("plot 2")
#plot 3:
x = np.array([1, 2, 3, 4])
y = np.array([3, 5, 7, 9])
plt.subplot(2, 2, 3)
plt.plot(x,y)
plt.title("plot 3")
#plot 4:
x = np.array([1, 2, 3, 4])
y = np.array([4, 5, 6, 7])
plt.subplot(2, 2, 4)
plt.plot(x,y)
plt.title("plot 4")
plt.suptitle("w3cschool subplot test")
plt.show()
显示结果如下:
subplots()
subplots() 方法语法格式如下:
matplotlib.pyplot.subplots(nrows=1, ncols=1, *, sharex=false, sharey=false, squeeze=true, subplot_kw=none, gridspec_kw=none, **fig_kw)
参数说明:
- nrows:默认为 1,设置图表的行数。
- ncols:默认为 1,设置图表的列数。
- sharex、sharey:设置 x、y 轴是否共享属性,默认为 false,可设置为 'none'、'all'、'row' 或 'col'。 false 或 none 每个子图的 x 轴或 y 轴都是独立的,true 或 'all':所有子图共享 x 轴或 y 轴,'row' 设置每个子图行共享一个 x 轴或 y 轴,'col':设置每个子图列共享一个 x 轴或 y 轴。
- squeeze:布尔值,默认为 true,表示额外的维度从返回的 axes(轴)对象中挤出,对于 n*1 或 1*n 个子图,返回一个 1 维数组,对于 n*m,n>1 和 m>1 返回一个 2 维数组。如果设置为 false,则不进行挤压操作,返回一个元素为 axes 实例的2维数组,即使它最终是1x1。
- subplot_kw:可选,字典类型。把字典的关键字传递给 add_subplot() 来创建每个子图。
- gridspec_kw:可选,字典类型。把字典的关键字传递给 gridspec 构造函数创建子图放在网格里(grid)。
- **fig_kw:把详细的关键字参数传给 figure() 函数。
实例
import matplotlib.pyplot as plt
import numpy as np
# 创建一些测试数据 -- 图1
x = np.linspace(0, 2*np.pi, 400)
y = np.sin(x**2)
# 创建一个画像和子图 -- 图2
fig, ax = plt.subplots()
ax.plot(x, y)
ax.set_title('simple plot')
# 创建两个子图 -- 图3
f, (ax1, ax2) = plt.subplots(1, 2, sharey=true)
ax1.plot(x, y)
ax1.set_title('sharing y axis')
ax2.scatter(x, y)
# 创建四个子图 -- 图4
fig, axs = plt.subplots(2, 2, subplot_kw=dict(projection="polar"))
axs[0, 0].plot(x, y)
axs[1, 1].scatter(x, y)
# 共享 x 轴
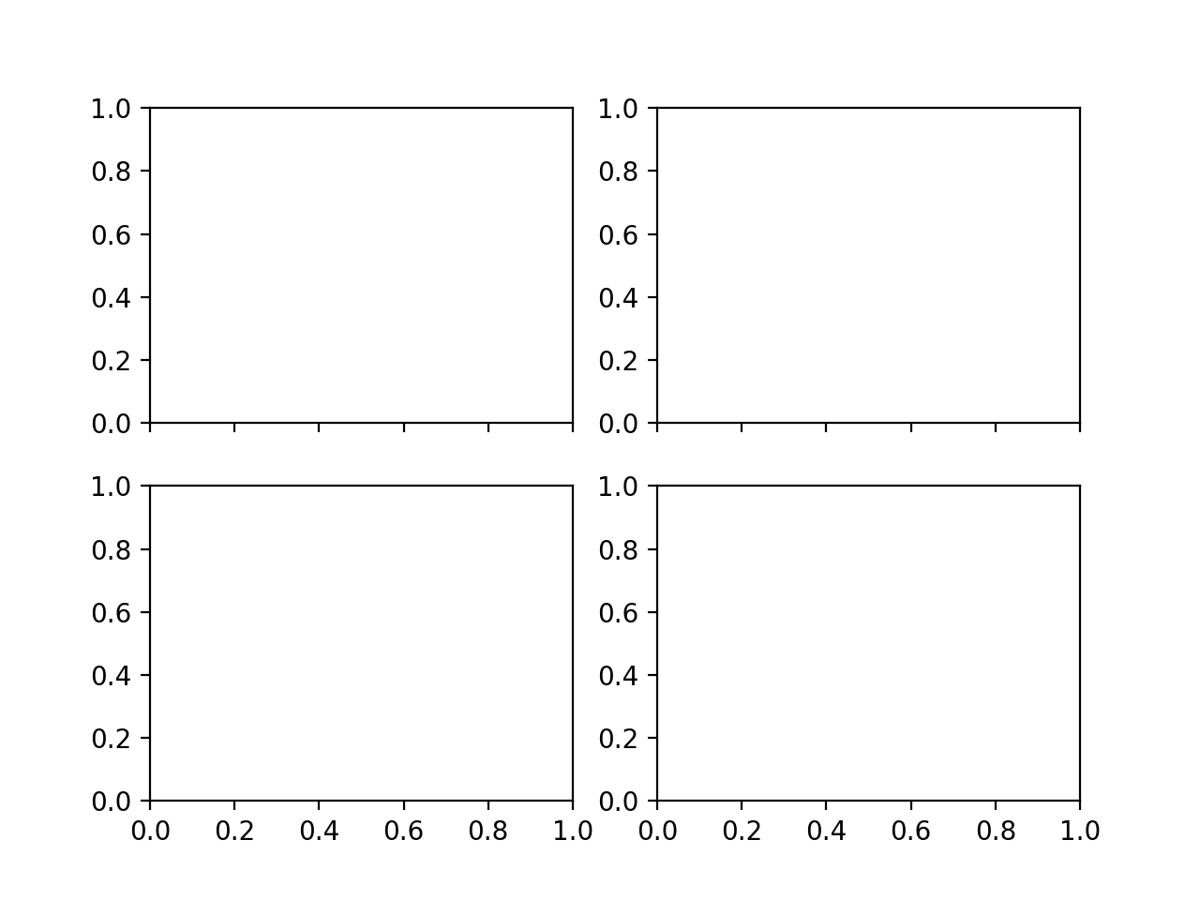
plt.subplots(2, 2, sharex='col')
# 共享 y 轴
plt.subplots(2, 2, sharey='row')
# 共享 x 轴和 y 轴
plt.subplots(2, 2, sharex='all', sharey='all')
# 这个也是共享 x 轴和 y 轴
plt.subplots(2, 2, sharex=true, sharey=true)
# 创建标识为 10 的图,已经存在的则删除
fig, ax = plt.subplots(num=10, clear=true)
plt.show()
部分图表显示结果如下:
图1
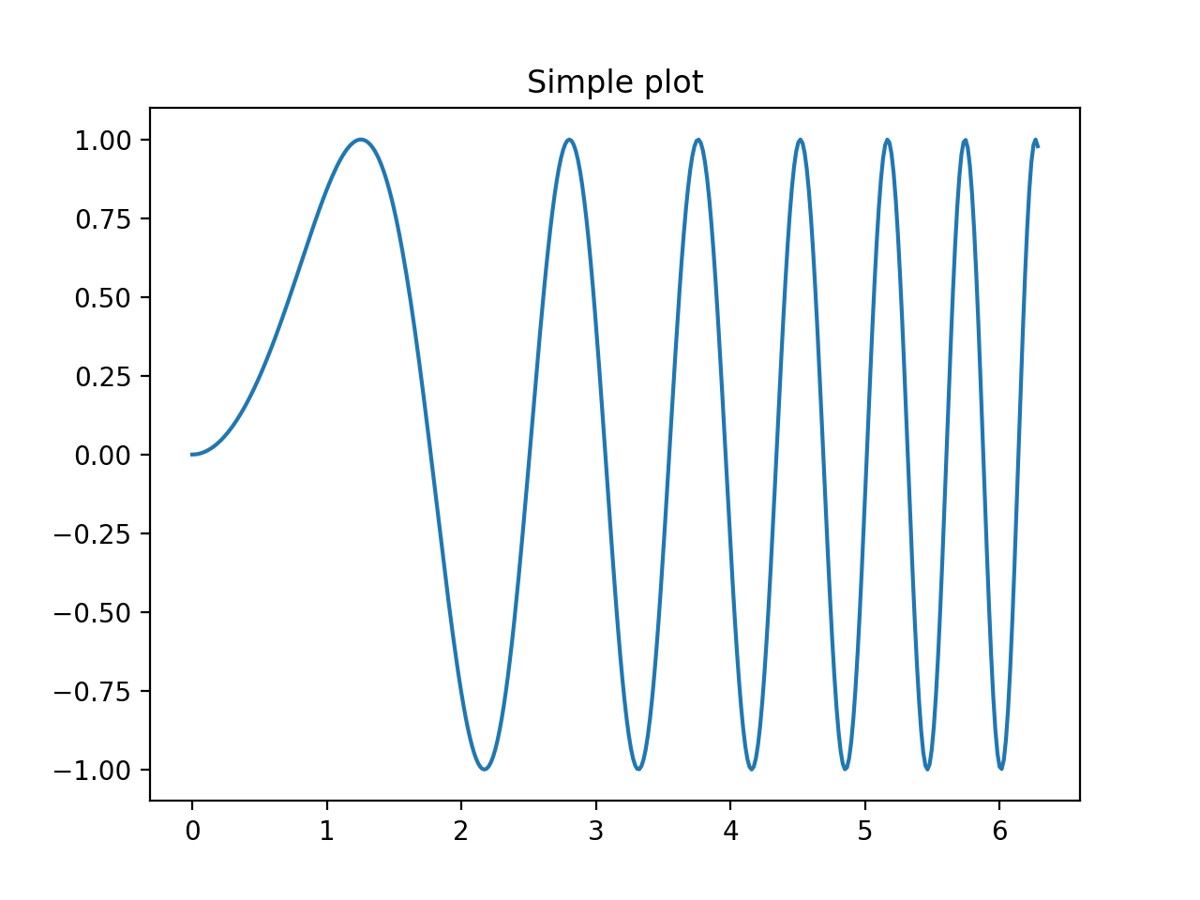
图2
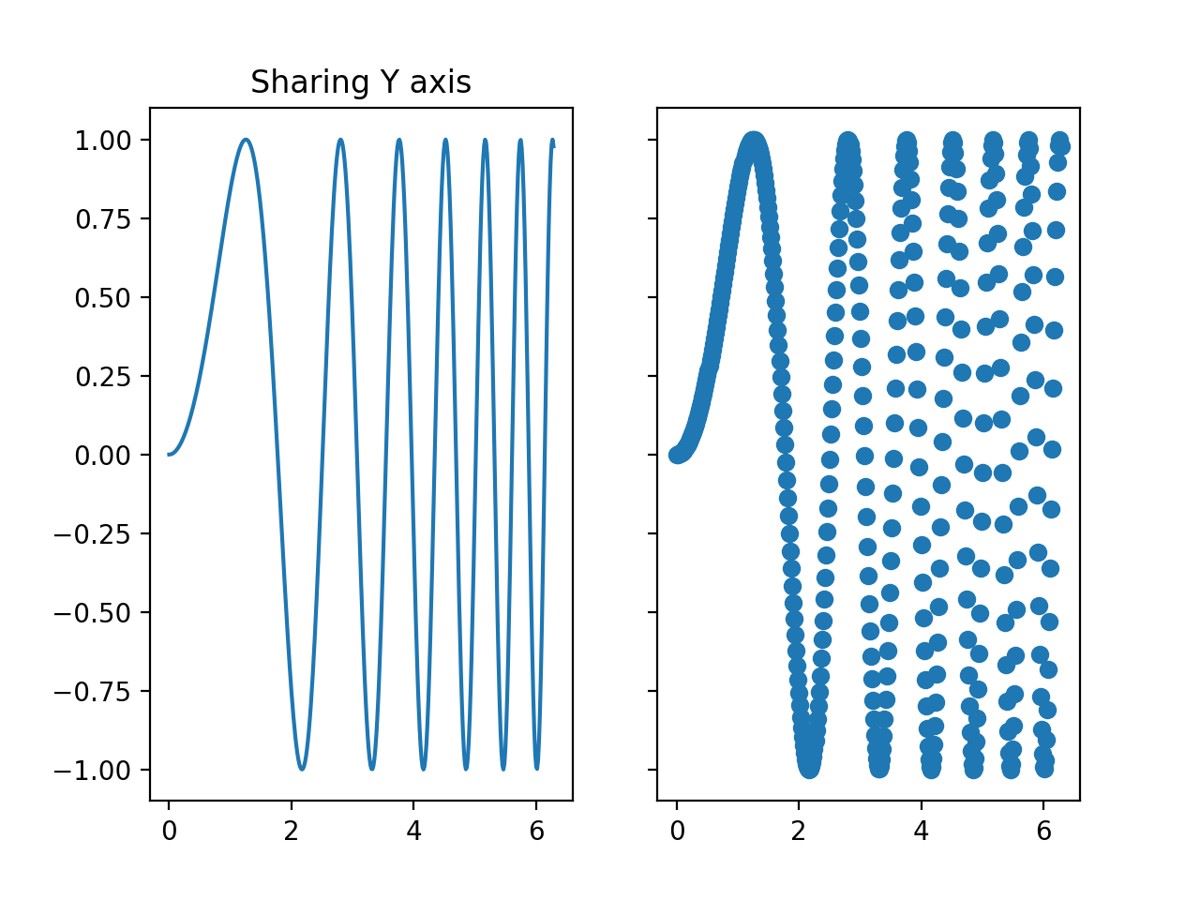
图3
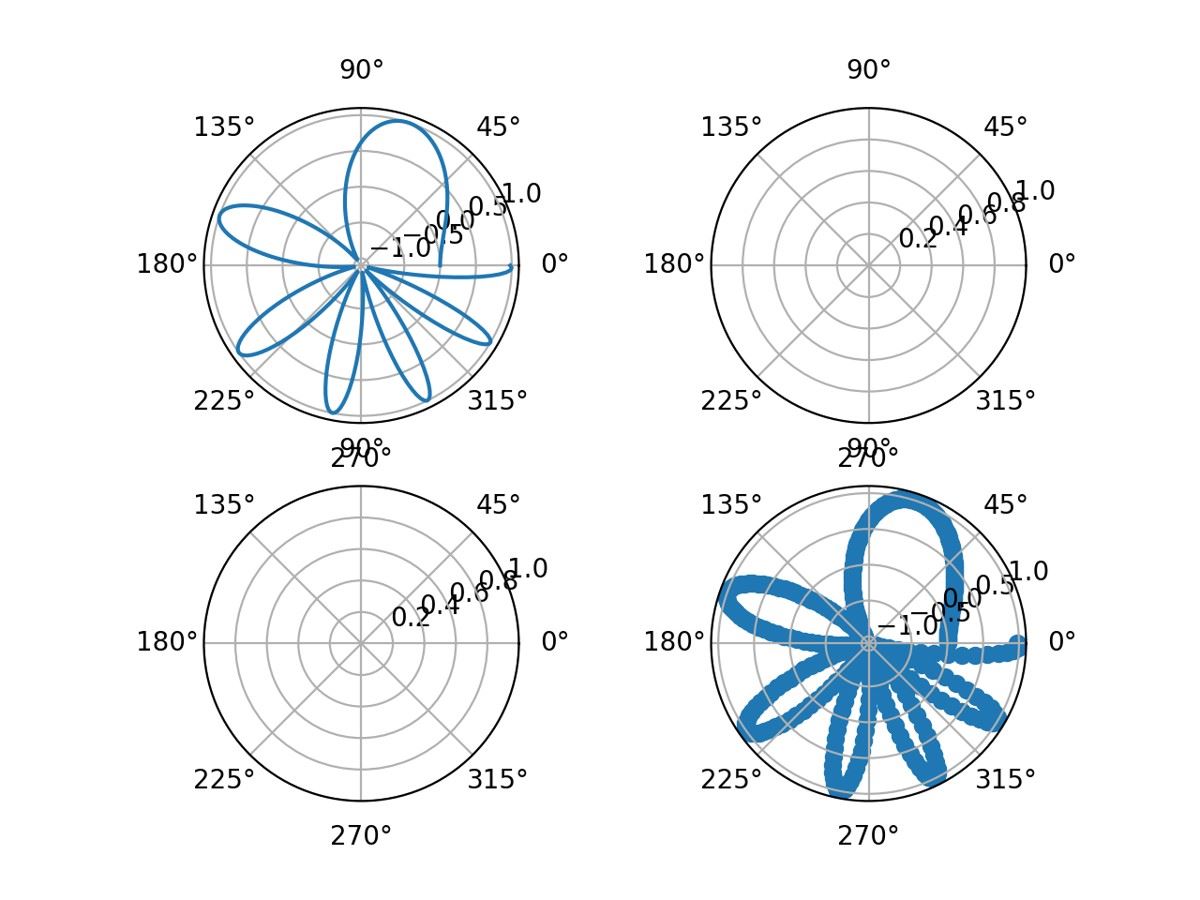
图4
总结
以上为个人经验,希望能给大家一个参考,也希望大家多多支持代码网。
赞 (0)
您想发表意见!!点此发布评论





发表评论