44人参与 • 2024-07-28 • Java
zookeeper解压后,在其bin目录下包含着常用的程序,例如 zkserver.sh zkcli.sh
我们使用zkcli.sh 就可以通过命令行使用zookeeper客户端
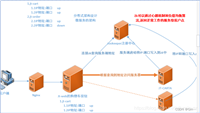
连接zookeeper服务器
连接后输入help就可以查看所有命令和使用方式的说明了
#对于本地默认端口 则可以直接 ./zkcli.sh
# -server 指定服务地址和端口
[root@localhost bin]# ./zkcli.sh -server localhost:15881
创建节点命令
create [-s][-e] path data acl
-s或-e分别指定节点特性,顺序或临时节点,若不指定,则创建持久节点;acl⽤来进⾏权限控制。
# 创建顺序节点
[zk: localhost:15881(connected) 0] create -s /zk-test datacontent1111
created /zk-test0000000007

# 创建临时节点,临时节点在会话结束后由就会被自动删除
[zk: localhost:15881(connected) 0] create -e /zk-temp data222
created /zk-temp

# 创建永久节点
[zk: localhost:15881(connected) 2] create /zk-test-permanent data333
created /zk-test-permanent
读取节点
可以使用ls查看子节点列表,使用 get 命令查看节点的内容
# 使用 ls 命令查看子节点
[zk: localhost:15881(connected) 4] ls /
[lg-persistent, zk-premament, zk-temp, zk-test-permanent, zk-test0000000000, zk-test0000000007, zookeeper]

# 使用 get 命令查看节点内容 get -s 则可以附加打印节点状态信息
[zk: localhost:15881(connected) 6] get /zk-temp
data222

# stat 命令查看节点状态
[zk: localhost:15881(connected) 0] stat /zk-temp
czxid = 0x30000000a
ctime = wed jul 05 10:48:44 cst 2023
mzxid = 0x30000000a
mtime = wed jul 05 10:48:44 cst 2023
pzxid = 0x30000000a
cversion = 0
dataversion = 0
aclversion = 0
ephemeralowner = 0x100008d52290003
datalength = 7
numchildren = 0
更新节点内容
命令:set path data [version] version表示数据版本,在zookeeper中,节点的数据是有版本概念的,这个参数⽤于指定本次更新操作是基于znode的哪⼀个数据版本进⾏的,如果版本和最新版本对不上则会更新失败,这样可以防止覆盖最新写入的数据。
set /zk-premament 666
删除节点
删除命令 **delete path [version]**** **如果删除的节点包含子节点,那么必须先删除子节点才能删除对应节点。
通过maven引入zookeeper提供了java客户端api依赖,截至当前时间最新稳定版是 3.7.1
<dependency>
  <groupid>org.apache.zookeeper</groupid>
  <artifactid>zookeeper</artifactid>
  <version>3.7.1</version>
</dependency>
/**
 * zookeeper api 简单使用
 *
 * @author liuyp
 */
public class zookeeperapisimpletest {
    //是否完成连接的建立
    static boolean connected = false;
    static object lock = new object();

    //zookeeper实例对象
    static zookeeper zookeeper;

    //定义watcher的回调 它会收到客户端状态变化的通知,也可以收到节点事件的通知
    static watcher watcherprocess = (watchedevent) -> {
        //客户端连接成功状态通知
        if (watchedevent.getstate() == watcher.event.keeperstate.syncconnected && !connected) {
            system.out.println("watcher回调:客户端连接上线");
            synchronized (lock) {
                //连接成功就通知方法返回
                connected = true;
                lock.notifyall();
            }
        }

        //子节点列表变化通知
        if (watchedevent.gettype() == watcher.event.eventtype.nodechildrenchanged) {
            try {
                //获取最新的子节点,并重新开启watch
                list<string> children = zookeeper.getchildren(watchedevent.getpath(), true);
                system.out.println("watcher回调:子节点变化通知 节点:" + watchedevent.getpath() + " 的最新子节点:" + children);
            } catch (keeperexception e) {
                e.printstacktrace();
            } catch (interruptedexception e) {
                e.printstacktrace();
            }
        }

        //节点内容变更事件
        if (watchedevent.gettype() == watcher.event.eventtype.nodedatachanged) {
            try {
                byte[] data = zookeeper.getdata(watchedevent.getpath(), false, null);
                system.out.println("watcher回调:节点数据变化通知 节点:" + watchedevent.getpath() + " 内容为:" + new string(data));
            } catch (keeperexception e) {
                e.printstacktrace();
            } catch (interruptedexception e) {
                e.printstacktrace();
            }
        }

        //节点删除通知
        if (watchedevent.gettype() == watcher.event.eventtype.nodedeleted) {
            system.out.println("watcher回调:节点被删除通知:" + watchedevent.getpath());
        }

    };


    /**
     * demo测试入口
     *
     * @param args
     * @throws ioexception
     * @throws interruptedexception
     * @throws keeperexception
     */
    public static void main(string[] args) throws ioexception, interruptedexception, keeperexception {
        //同步的方式建立会话
        createsession();
        //测试创建节点,先删除上一次创建的
        createznode();
        //获取节点数据
        getznodedata();
        //更新节点数据
        updateznodedata();
        //删除节点
        deleteznode();
    }


    /**
     * 一、创建会话
     * 创建zookeeper会话初始化zookeeper对象
     * 这里改成同步执行,连接上了方法才返回
     */
    public synchronized static void createsession() throws ioexception, interruptedexception {
        //可以配置多个地址客户端会随机连接例如 192.168.188.130:15881,192.168.188.130:15882
        string connectstring = "192.168.188.130:15881";
        //会话超时时间 单位是毫秒
        int sessiontimeout = 5000;
        //执行结果立即返回,后台异步建立连接。watcherprocess
        zookeeper = new zookeeper(connectstring, sessiontimeout, watcherprocess);
        if (connected) {
            return;
        }
        //如果没执行完,就让出锁进入等待状态,等待出结果后被唤醒
        synchronized (lock) {
            lock.wait();
        }
    }


    /**
     * 二、创建znode
     */
    public static void createznode() throws keeperexception, interruptedexception {
        //创建一个测试的公共节点,后续都在这个节点下面测试,并且给他加一个watch
        string testparentnodepath = "/zookeeperapi";
        if (zookeeper.exists(testparentnodepath,false)==null){
            zookeeper.create(testparentnodepath, "父节点".getbytes(standardcharsets.utf_8), zoodefs.ids.open_acl_unsafe, createmode.persistent);
        }
        //添加监听 exist&getdata
        zookeeper.addwatch(testparentnodepath, addwatchmode.persistent_recursive);
        zookeeper.getchildren(testparentnodepath, true);

        /**
         * path:节点创建路径
         * data[] :字节数组格式保存到节点的数据
         * acl:节点acl权限设置
         * createmode:创建的节点类型。persistent:持久节点 ephemeral临时节点 ,还有临时顺序节点,持久顺序节点
         */
        string znodepersistent = zookeeper.create(
                testparentnodepath + "/persistent",
                "持久节点内容".getbytes(),
                zoodefs.ids.open_acl_unsafe, createmode.persistent);

        string znodeephemeralsequential = zookeeper.create(
                testparentnodepath + "/ephemeralsequential",
                "临时顺序节点内容".getbytes(),
                zoodefs.ids.open_acl_unsafe, createmode.ephemeral_sequential);

        string znodeephemeral = zookeeper.create(
                testparentnodepath + "/persistentephemeral",
                "临时节点内容".getbytes(),
                zoodefs.ids.open_acl_unsafe, createmode.ephemeral);

    }


    /**
     * 三、获取节点数据
     */
    public static void getznodedata() throws keeperexception, interruptedexception {
        string testparentnodepath = "/zookeeperapi";
        byte[] data = zookeeper.getdata(testparentnodepath, false, null);
        system.out.println("节点:" + testparentnodepath + " 内容为:" + new string(data));
    }

    /**
     * 三、更新节点数据
     */
    public static void updateznodedata() throws keeperexception, interruptedexception {
        string testparentnodepath = "/zookeeperapi";
        zookeeper.setdata(testparentnodepath, ("新数据" + math.random()).getbytes(), -1);
    }


    /**
     * 四、删除znode
     */
    public static void deleteznode() throws keeperexception, interruptedexception {
        string testparentnodepath = "/zookeeperapi";
        zookeeper.delete(testparentnodepath + "/persistent", -1);
    }


}
<!-- https://mvnrepository.com/artifact/com.101tec/zkclient -->
<dependency>
  <groupid>com.101tec</groupid>
  <artifactid>zkclient</artifactid>
  <version>0.11</version>
</dependency>
public class zkclienttest {

    static countdownlatch countdownlatch = new countdownlatch(1);

    public static void main(string[] args) throws interruptedexception {
        string testzkclientpath = "/zkclientapi";

        //建立连接,这里是同步的方式
        string connectstring = "192.168.188.130:15881";
        zkclient zkclient = new zkclient(connectstring);

        //创建节点,zkclient支持递归创建,没有父节点会自动创建对应的父节点
        zkclient.createpersistent(testzkclientpath + "/persistent", true);
        zkclient.createpersistent(testzkclientpath + "/persistent_readydelete", true);

        //删除节点 zkclient支持自动删除节点下的子节点
        zkclient.delete(testzkclientpath + "/persistent_readydelete", -1);

        //获取子节点
        list<string> children = zkclient.getchildren(testzkclientpath);
        system.out.println("读取节点:" + testzkclientpath + " 子节点:" + children);

        //监听事件注册
        //注册子节点变更事件
        zkclient.subscribechildchanges(testzkclientpath, (path, childnodelist) -> {
            system.out.println("节点子节点监听事件通知:节点:" + path + " 最新子节点:" + childnodelist);
        });
        //注册节点数据变更事件
        zkclient.subscribedatachanges(testzkclientpath, new izkdatalistener() {
            @override
            public void handledatachange(string s, object o) throws exception {
                system.out.println("节点数据监听事件通知:节点:" + s + " 最新数据:" + o);
            }

            @override
            public void handledatadeleted(string s) throws exception {
                system.out.println("节点数据监听事件通知:节点:" + s + " 已删除");
            }
        });

        //写入节点数据
        zkclient.writedata(testzkclientpath, system.currenttimemillis() + "写入数据");

        //获取节点数据
        object readdataresult = zkclient.readdata(testzkclientpath);
        system.out.println("读取节点数据:" + testzkclientpath + " : " + readdataresult);

        //删除节点
        zkclient.deleterecursive(testzkclientpath);

        //阻塞最后的结束程序
        countdownlatch.await();
    }
}
<!-- https://mvnrepository.com/artifact/org.apache.curator/curator-framework -->
<dependency>
  <groupid>org.apache.curator</groupid>
  <artifactid>curator-framework</artifactid>
  <version>5.5.0</version>
</dependency>
/**
 * curator 是netflix公司开源的一套zookeeper客户端框架
 * 和zkclient一样,curator解决了很多细节的底层工作,包括连接重连、watch自动重新注册
 * 节点不存在异常等,并且提供了基于fluent编程风格的支持
 * @author liuyp
 */
public class curatortest {

    public static void main(string[] args) throws exception {
        //连接信息,多个连接使用逗号分隔
        string connectstring = "192.168.188.130:15881";

        /**
         * 一、发起连接
         *
         * retrypolicy重连策略 默认提供三种重连策略
         * 1、exponentialbackoffretry(基于backoff的重连策略)重新尝试一定次数,并增加重试之间的睡眠时间
         * 2、retryntimes(重连n次策略)
         * 3、retryforever(永远重试策略)
         *
         * 创建连接 curatorframework
         * 1、通过curatorframeworkfactory.newclient 底层是curatorframeworkfactory.build
         * 2、直接通过 curatorframeworkfactory.build
         *
         * 启动连接 curatorframework.start()
         */
        int basesleeptimems=1000; //重试之间等待的初始时间
        int maxretries=5;//最大重试次数
        int maxsleepms=5000;//每次重试的最大睡眠时间 如果算出来的sleepms超过这个时间,则采用maxsleepms
        //重试间隔时间: basesleeptimems * math.max(1, random.nextint(1 << (retrycount + 1)));
        retrypolicy retrypolicy=new exponentialbackoffretry(basesleeptimems,maxretries,maxsleepms);

        curatorframework client = curatorframeworkfactory.builder()
                .connectstring(connectstring)
                .sessiontimeoutms(10000)
                .connectiontimeoutms(5000)
                .retrypolicy(retrypolicy)
                .namespace("curatorapi") //加上这个以后,所有路径都是以这个路径为根路径
                .build();

        client.start();

        system.out.println("**********客户端已启动**********");

        /**
         * 二、创建节点
         * 1、默认创建内容为空的永久节点
         * 2、设置节点内容和原生一样,使用字节数组
         * 3、可以使用 creatingparentsifneeded 方法自动创建父节点,避免需要递归判断父节点是否存在
         */
        client.create()
                .creatingparentcontainersifneeded()
                .withmode(createmode.persistent)
                .forpath("/tempnode/create","临时节点".getbytes(standardcharsets.utf_8));

        /**
         * 三、测试增加监听
         * 1、监听类型 persistent_recursive 会循环监听注册节点和其子节点的数据变化和是否存在
         */
        curatorwatcher curatorwatcher=(watchevent)->{
            system.out.println("[监听通知:]"+"节点:"+watchevent.getpath()+" "+watchevent.gettype());
        };
        client.watchers().add().withmode(addwatchmode.persistent_recursive).usingwatcher(curatorwatcher).forpath("/tempnode");
        client.create().forpath("/tempnode/watcher");

        /**
         * 三、读取&修改节点数据 并获取状态数据
         */
        stat stat=new stat();
        byte[] bytes = client.getdata().storingstatin(stat).forpath("/tempnode/create");
        system.out.println("读取节点数据:"+new string(bytes,standardcharsets.utf_8));
        system.out.println("读取节点状态:"+stat.tostring());
        client.setdata().forpath("/tempnode/create","节点/tempnode/create的新数据".getbytes(standardcharsets.utf_8));

        /**
         * 四、删除节点
         */
        client.delete().forpath("/tempnode/watcher");
        client.delete().forpath("/tempnode/create");
        client.delete().forpath("/tempnode");


    }

}
您想发表意见!!点此发布评论
版权声明:本文内容由互联网用户贡献,该文观点仅代表作者本人。本站仅提供信息存储服务,不拥有所有权,不承担相关法律责任。 如发现本站有涉嫌抄袭侵权/违法违规的内容, 请发送邮件至 2386932994@qq.com 举报,一经查实将立刻删除。


发表评论