node.js中实现GET和POST请求的代码示例
147人参与 • 2025-02-13 • Node.js
创建基本的服务器
const express = require('express');
const indexrouter = require('./router'); // 引入路由
const app = express();
const port = 3000;
// 挂载路由
app.use('/api', indexrouter);
app.listen(port, () => {
  console.log(`server is running on http://localhost:${port}`);
});
创建路由文件
const express = require('express');
const router = express.router();

module.exports = router;
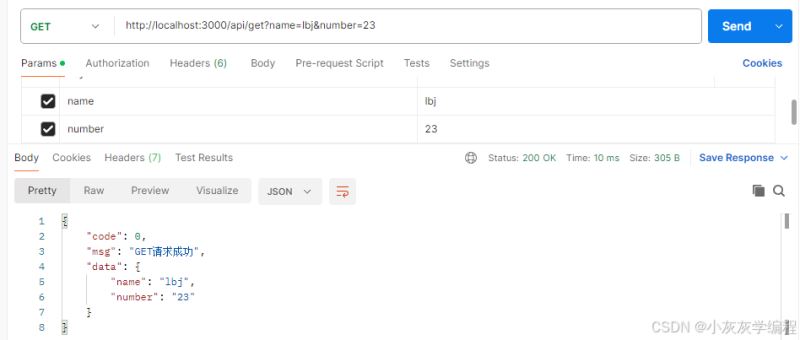
实现get请求
// 处理get请求
router.get('/get', (req, res) => {
  // 通过 req.query 客户端发送到服务器的数据
  const query = req.query;
  console.log(query, 'query')
  res.send({
    code: 0, // 0: 请求成功  -1: 请求失败
    msg: 'get请求成功', // 请求的状态描述
    data: query, // 服务器像客户端返回数据
  });
});
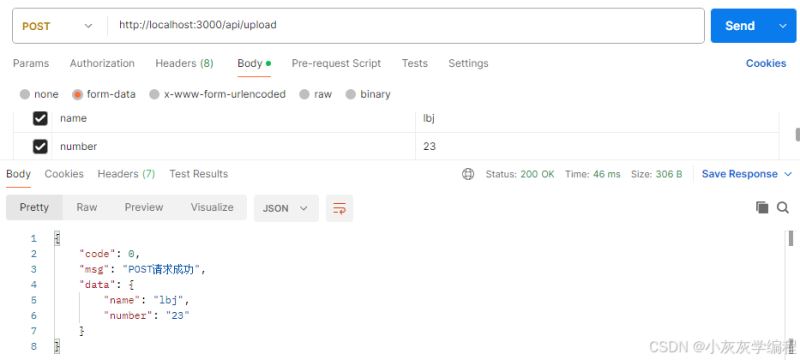
实现post请求
方式1:form-data,express默认不会解析form-data,因为它通常用于文件上传,需要额外的处理。你可以使用multer这个中间件来处理multipart/form-data(也就是form-data)类型的请求。multer是专门为express设计的,用于处理多部分/表单数据,这包括上传文件。
// 设置multer存储选项(这里只是演示,实际上你可能需要配置磁盘存储或其他选项)
const storage = multer.memorystorage();
const upload = multer({ storage: storage });
// 处理post请求
router.post('/upload', upload.single('file'), (req, res) => {
   // 通过 req.query 客户端发送到服务器的数据
   const body = req.body;
   console.log(body, 'body')
   res.send({
     code: 0, // 0: 请求成功  -1: 请求失败
     msg: 'post请求成功', // 请求的状态描述
     data: body, // 服务器像客户端返回数据
   });
});
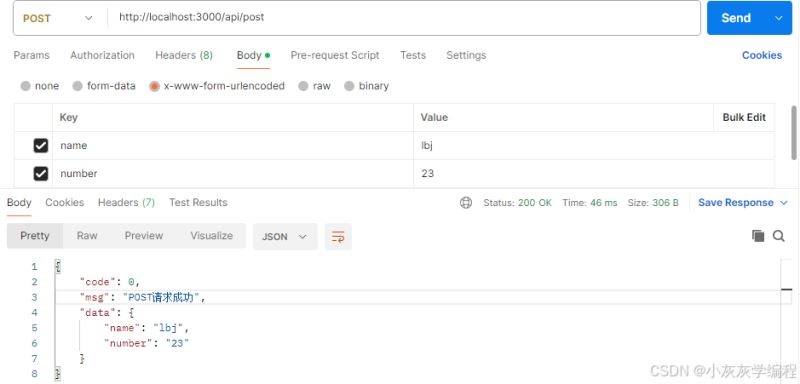
方式2:urlencoded,想要获取url-encoded请求体的数据,需要引入对应的中间件。
// 配置解析表单数据的中间件
app.use(express.urlencoded({extended: false}))
// 处理post请求
router.post('/post', (req, res) => {
  // 通过 req.query 客户端发送到服务器的数据
  const body = req.body;
  console.log(body, 'body')
  res.send({
    code: 0, // 0: 请求成功  -1: 请求失败
    msg: 'post请求成功', // 请求的状态描述
    data: body, // 服务器像客户端返回数据
  });
});
全部代码
index.js
const express = require('express');
const indexrouter = require('./router'); // 引入路由
const app = express();
const port = 3000;
// 配置解析表单数据的中间件
app.use(express.urlencoded({extended: false}))
// 挂载路由
app.use('/api', indexrouter);
// 启动服务器
app.listen(port, () => {
  console.log(`server is running on http://localhost:${port}`);
});
router.js
const express = require('express');
const multer = require('multer');
const router = express.router();
// 设置multer存储选项(这里只是演示,实际上你可能需要配置磁盘存储或其他选项)
const storage = multer.memorystorage(); // 使用内存存储,适用于小文件或不需要持久化的场景
const upload = multer({ storage: storage });
// 处理get请求
router.get('/get', (req, res) => {
  // 通过 req.query 客户端发送到服务器的数据
  const query = req.query;
  console.log(query, 'query')
  res.send({
    code: 0, // 0: 请求成功  -1: 请求失败
    msg: 'get请求成功', // 请求的状态描述
    data: query, // 服务器像客户端返回数据
  });
});
// 处理post请求
router.post('/upload', upload.single('file'), (req, res) => {
   // 通过 req.query 客户端发送到服务器的数据
   const body = req.body;
   console.log(body, 'body')
   res.send({
     code: 0, // 0: 请求成功  -1: 请求失败
     msg: 'post请求成功', // 请求的状态描述
     data: body, // 服务器像客户端返回数据
   });
});
// 处理post请求
router.post('/post', (req, res) => {
  // 通过 req.query 客户端发送到服务器的数据
  const body = req.body;
  console.log(body, 'body')
  res.send({
    code: 0, // 0: 请求成功  -1: 请求失败
    msg: 'post请求成功', // 请求的状态描述
    data: body, // 服务器像客户端返回数据
  });
});
module.exports = router;
到此这篇关于node.js中实现get和post请求的代码示例的文章就介绍到这了,更多相关node.js实现get和post请求内容请搜索代码网以前的文章或继续浏览下面的相关文章希望大家以后多多支持代码网!
赞 (0)
您想发表意见!!点此发布评论


发表评论