kubeadm部署k8s集群全过程
239人参与 • 2025-02-14 • 云虚拟主机
环境准备
本文基于vmware虚拟机,基于centos 8操作系统实现。
机器节点信息
| 服务器 | ip地址 |
| master | 192.168.31.80 |
| node1 | 192.168.31.8 |
| node2 | 192.168.31.9 |
更换镜像地址
sudo sed -i 's/mirrorlist/#mirrorlist/g' /etc/yum.repos.d/centos-*
sudo sed -i 's|#baseurl=http://mirror.centos.org|baseurl=http://vault.centos.org|g' /etc/yum.repos.d/centos-*
更换语言环境
dnf install glibc-langpack-zh.x86_64

echo lang=zh_cn.utf-8 > /etc/locale.conf

source /etc/locale.conf
更换时区
timedatectl list-timezones
timedatectl set-timezone asia/shanghai
timedatectl
关闭防火墙
systemctl stop firewalld
systemctl stop iptables
iptables -f &&  iptables -t nat -f &&  iptables -t mangle -f &&  iptables -x
关闭selinux
- 临时关闭
setenforce 0
- 永久关闭
#vim /etc/selinux/config 然后设置 selinux=disabled
vim /etc/selinux/config
关闭交换分区
swapoff -a
sed -ri  's/.*swap.*/#&/' /etc/fstab

修改主机信息
# 查看当前主机名称
hostname
# 修改主机名称 master节点修改成master、node1节点修改成node1、node2节点修改成node2
hostnamectl set-hostname master

更新节点的本地域名ip解析
# 编辑hosts文件,将master、node1、node2节点ip添加进去,三个节点都需要添加
vim /etc/hosts

调整内核参数
cd /etc/sysctl.d/

#更新kubernetes.conf文件信息
cat > kubernetes.conf   << eof
#开启网桥模式,可将网桥的流量传递给iptables链
net.bridge.bridge-nf-call-ip6tables=1
net.bridge.bridge-nf-call-iptables=1
#关闭ipv6协议
net.ipv6.conf.all.disable_ipv6=1
net.ipv4.ip_forward=1
eof

# 加载参数

sysctl --system
安装docker
yum install -y yum-utils device-mapper-persistent-data lvm2

yum-config-manager --add-repo https://mirrors.aliyun.com/docker-ce/linux/centos/docker-ce.repo

yum install -y docker-ce docker-ce-cli containerd.io
配置docker
cd /etc/docker/

cat > daemon.json << eof
{
  "exec-opts": ["native.cgroupdriver=systemd"],
  "log-driver": "json-file",
  "log-opts": {
    "max-size": "100m"
  },
  "storage-driver": "overlay2",
  "registry-mirrors" : [
    "https://ot2k4d59.mirror.aliyuncs.com/"
  ]
}
eof

systemctl daemon-reload

systemctl restart docker.service

systemctl enable docker.service

docker info | grep "cgroup driver"
到此,docker安装成功。
配置k8s源
cd /etc/yum.repos.d/

cat > kubernetes.repo << eof
[kubernetes]
name=kubernetes
baseurl=https://mirrors.aliyun.com/kubernetes/yum/repos/kubernetes-el7-x86_64
enabled=1
gpgcheck=0
repo_gpgcheck=0
gpgkey=https://mirrors.aliyun.com/kubernetes/yum/doc/yum-key.gpg https://mirrors.aliyun.com/kubernetes/yum/doc/rpm-package-key.gpg
eof
安装kubeadm kubelet kubectl
yum install -y kubelet-1.21.3 kubeadm-1.21.3 kubectl-1.21.3
开机自启kubelet
systemctl enable kubelet.service

systemctl start kubelet
到此,kubeadm、kubelet、kubectl 安装完成,截至目前为止,以上内容,master、node1、node2都需要执行。
master节点部署
初始化kubeadm
# --apiserver-advertise-address 初始化master监听地址,改成自己的master节点ip地址
# --image-repository 指定aliyun下载源
# --kubernetes-version 指定k8s下载版本
# --service-cidr 设置集群内部网络
# --pod-network-cidr 设置pod的网络
# service-cidr和pod-network-cidr最好就用这个,不然后面安装kube-flannel,就需要修改kube-flannel.yaml的配置
kubeadm init --apiserver-advertise-address=192.168.31.80 --image-repository registry.aliyuncs.com/google_containers --kubernetes-version v1.21.14 --service-cidr=10.96.0.0/12 --pod-network-cidr=10.244.0.0/16


# 进入kubernetes 配置中
cd /etc/kubernetes/manifests

# 26行 --port=0 #注释掉
vim kube-controller-manager.yaml


#19行  --port=0 #注释掉
vim kube-scheduler.yaml

#给node节点添加标签
kubectl label node node1  node-role.kubernetes.io/node=node1

kubectl label node node2  node-role.kubernetes.io/node=node2
执行kubectl管理工具
mkdir -p $home/.kube

sudo  cp  -i  /etc/kubernetes/admin.conf  $home/.kube/config

sudo  chown  $(id --u):$(id -g)  $home/.kube/config
token制作
# 主要是node1、node2节点join 进入master节点需要
kubeadm token create --print-join-command
node节点加入集群
# 上一步生成的token,粘贴命令到node1、node2节点执行
kubeadm join 192.168.48.130:6443 --token jgijaq.wpzj5oco3j03u1nb --discovery-token-ca-cert-hash sha256:c7c9a9e411fecb16807ea6bace2ce4a22828f2505167049ab20000c1cb5360b4
#查看集群节点信息
kubectl get nodes

我们发现,集群节点的状态都是notready状态,这是因为我们还没有安装网络插件,下面,我们需要安装kube-flannel插件
安装kube-flannel插件(所有节点都需要)
# 新建kube-flannel.yml
cat > kube-flannel.yml
# 然后去github上面去把kube-flannel.yml内容粘贴下来,复制到本地的kube-flannel.yml文件中,地址:https://github.com/flannel-io/flannel/blob/master/documentation/kube-flannel.yml

vim kube-flannel.yml
# kube-flannel.yml内容,不需要修改,直接可以使用
---
kind: namespace
apiversion: v1
metadata:
  name: kube-flannel
  labels:
    k8s-app: flannel
    pod-security.kubernetes.io/enforce: privileged
---
kind: clusterrole
apiversion: rbac.authorization.k8s.io/v1
metadata:
  labels:
    k8s-app: flannel
  name: flannel
rules:
- apigroups:
  - ""
  resources:
  - pods
  verbs:
  - get
- apigroups:
  - ""
  resources:
  - nodes
  verbs:
  - get
  - list
  - watch
- apigroups:
  - ""
  resources:
  - nodes/status
  verbs:
  - patch
- apigroups:
  - networking.k8s.io
  resources:
  - clustercidrs
  verbs:
  - list
  - watch
---
kind: clusterrolebinding
apiversion: rbac.authorization.k8s.io/v1
metadata:
  labels:
    k8s-app: flannel
  name: flannel
roleref:
  apigroup: rbac.authorization.k8s.io
  kind: clusterrole
  name: flannel
subjects:
- kind: serviceaccount
  name: flannel
  namespace: kube-flannel
---
apiversion: v1
kind: serviceaccount
metadata:
  labels:
    k8s-app: flannel
  name: flannel
  namespace: kube-flannel
---
kind: configmap
apiversion: v1
metadata:
  name: kube-flannel-cfg
  namespace: kube-flannel
  labels:
    tier: node
    k8s-app: flannel
    app: flannel
data:
  cni-conf.json: |
    {
      "name": "cbr0",
      "cniversion": "0.3.1",
      "plugins": [
        {
          "type": "flannel",
          "delegate": {
            "hairpinmode": true,
            "isdefaultgateway": true
          }
        },
        {
          "type": "portmap",
          "capabilities": {
            "portmappings": true
          }
        }
      ]
    }
  net-conf.json: |
    {
      "network": "10.244.0.0/16",
      "backend": {
        "type": "vxlan"
      }
    }
---
apiversion: apps/v1
kind: daemonset
metadata:
  name: kube-flannel-ds
  namespace: kube-flannel
  labels:
    tier: node
    app: flannel
    k8s-app: flannel
spec:
  selector:
    matchlabels:
      app: flannel
  template:
    metadata:
      labels:
        tier: node
        app: flannel
    spec:
      affinity:
        nodeaffinity:
          requiredduringschedulingignoredduringexecution:
            nodeselectorterms:
            - matchexpressions:
              - key: kubernetes.io/os
                operator: in
                values:
                - linux
      hostnetwork: true
      priorityclassname: system-node-critical
      tolerations:
      - operator: exists
        effect: noschedule
      serviceaccountname: flannel
      initcontainers:
      - name: install-cni-plugin
        image: docker.io/flannel/flannel-cni-plugin:v1.1.2
       #image: docker.io/rancher/mirrored-flannelcni-flannel-cni-plugin:v1.1.2
        command:
        - cp
        args:
        - -f
        - /flannel
        - /opt/cni/bin/flannel
        volumemounts:
        - name: cni-plugin
          mountpath: /opt/cni/bin
      - name: install-cni
        image: docker.io/flannel/flannel:v0.22.0
       #image: docker.io/rancher/mirrored-flannelcni-flannel:v0.22.0
        command:
        - cp
        args:
        - -f
        - /etc/kube-flannel/cni-conf.json
        - /etc/cni/net.d/10-flannel.conflist
        volumemounts:
        - name: cni
          mountpath: /etc/cni/net.d
        - name: flannel-cfg
          mountpath: /etc/kube-flannel/
      containers:
      - name: kube-flannel
        image: docker.io/flannel/flannel:v0.22.0
       #image: docker.io/rancher/mirrored-flannelcni-flannel:v0.22.0
        command:
        - /opt/bin/flanneld
        args:
        - --ip-masq
        - --kube-subnet-mgr
        resources:
          requests:
            cpu: "100m"
            memory: "50mi"
        securitycontext:
          privileged: false
          capabilities:
            add: ["net_admin", "net_raw"]
        env:
        - name: pod_name
          valuefrom:
            fieldref:
              fieldpath: metadata.name
        - name: pod_namespace
          valuefrom:
            fieldref:
              fieldpath: metadata.namespace
        - name: event_queue_depth
          value: "5000"
        volumemounts:
        - name: run
          mountpath: /run/flannel
        - name: flannel-cfg
          mountpath: /etc/kube-flannel/
        - name: xtables-lock
          mountpath: /run/xtables.lock
      volumes:
      - name: run
        hostpath:
          path: /run/flannel
      - name: cni-plugin
        hostpath:
          path: /opt/cni/bin
      - name: cni
        hostpath:
          path: /etc/cni/net.d
      - name: flannel-cfg
        configmap:
          name: kube-flannel-cfg
      - name: xtables-lock
        hostpath:
          path: /run/xtables.lock
          type: fileorcreate
# 执行安装 kubectl apply -f kubu-flannel.yml
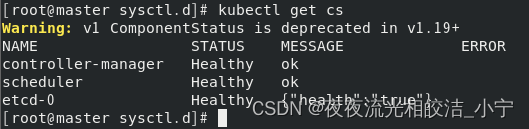
检测服务是否正常运行
#获取节点信息
kubectl get nodes

# 查看所有pod 节点
kubectl get pod -a

# 检查集群健康状态
kubectl get cs

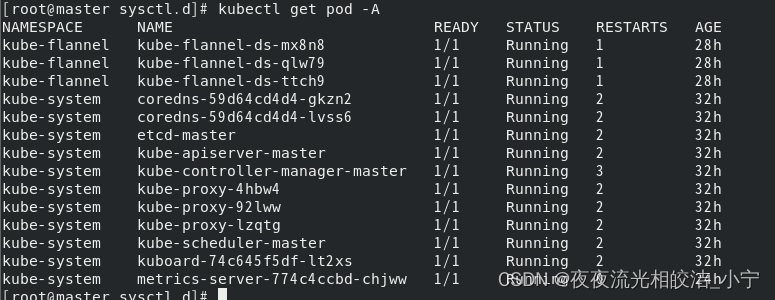
到此,k8s的集群就部署完成了。下面还需要部署kuboard ui页面。
安装kuboard ui页面
# 本次采用在线安装方式

kubectl apply -f https://kuboard.cn/install-script/kuboard.yaml

kubectl apply -f https://addons.kuboard.cn/metrics-server/0.3.6/metrics-server.yaml

# 查看 kuboard 运行状态
kubectl get pods -l k8s.kuboard.cn/name=kuboard -n kube-system

获取管理员权限token
echo $(kubectl -n kube-system get secret $(kubectl -n kube-system get secret | grep kuboard-user | awk '{print $1}') -o go-template='{{.data.token}}' | base64 -d)访问kuboard ui页面
# 查看pod 节点信息,获取kuboard 服务的ip地址,便于浏览器访问kuboard ui页面
kubectl get pod -n kube-system -o wide
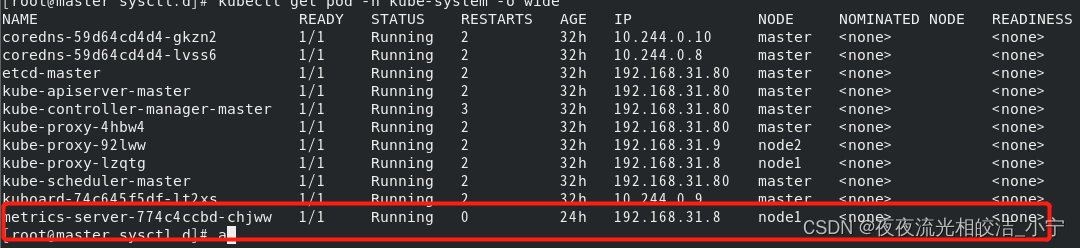
获取到kuboard ui页面的ip是192.168.31.8,默认端口是32567,我们直接浏览器访问:

粘贴我们刚才获取到的token,就可以进行登录了
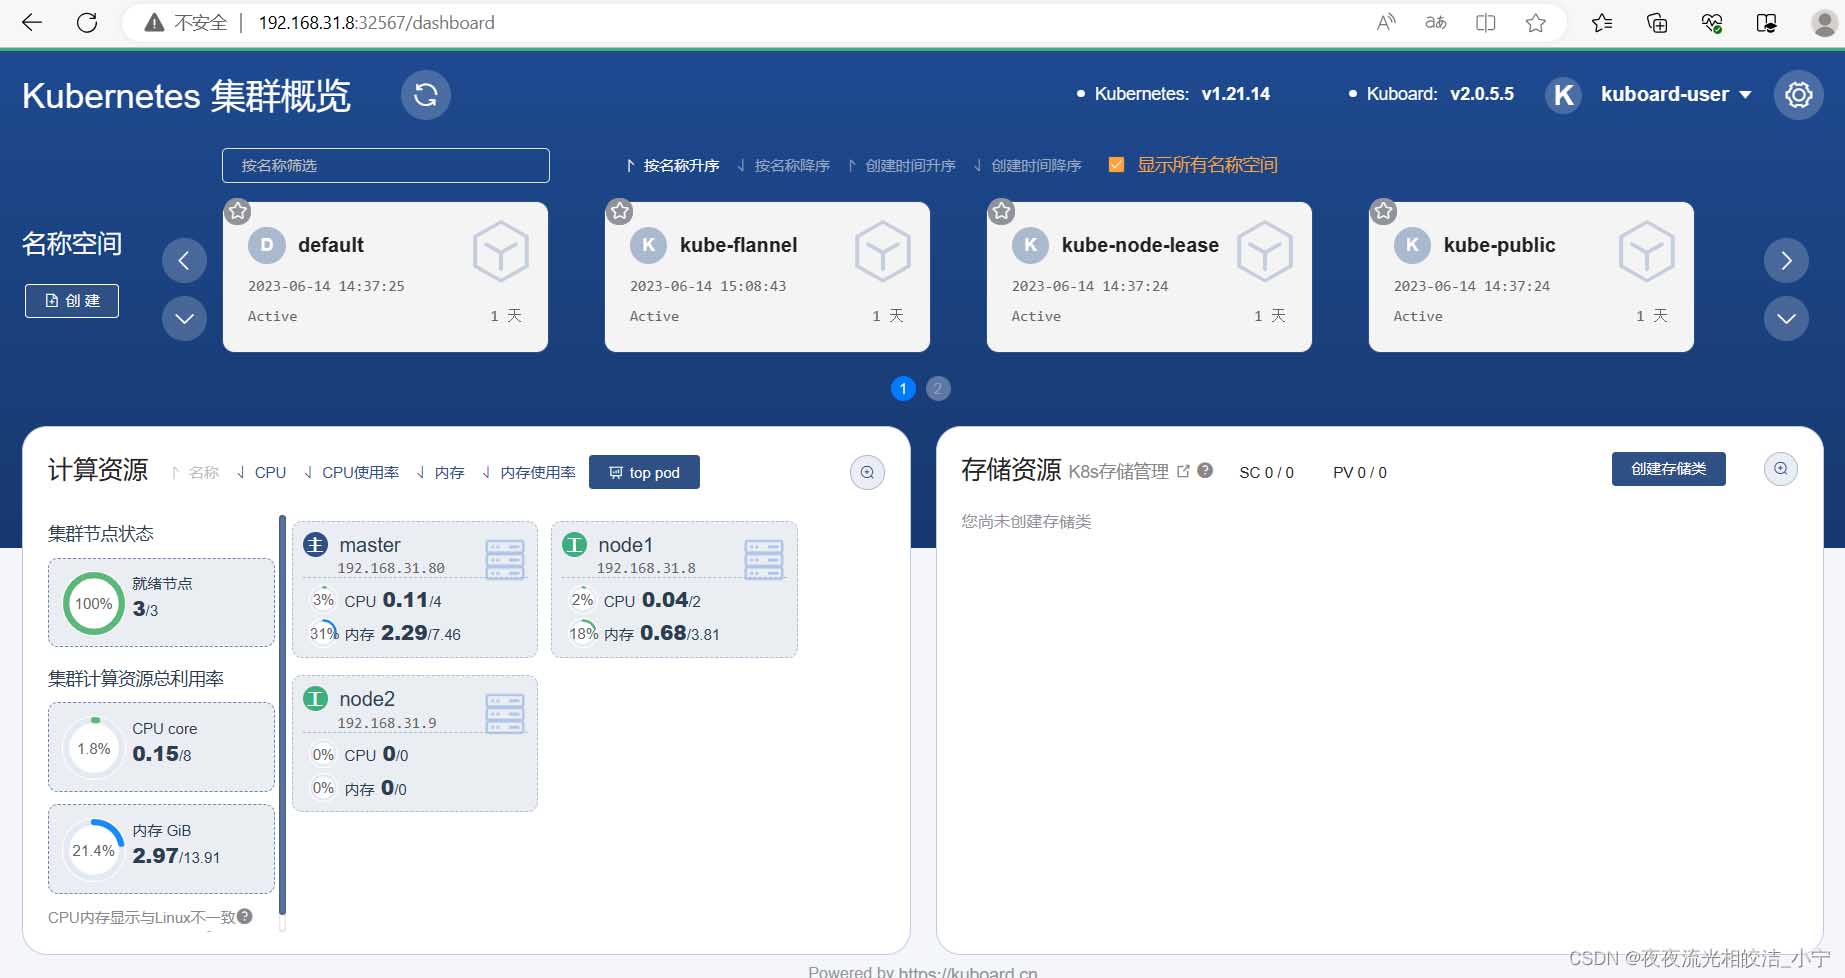
到此,k8s集群搭建完成!
总结
以上为个人经验,希望能给大家一个参考,也希望大家多多支持代码网。
赞 (0)
您想发表意见!!点此发布评论


发表评论