如何使用Docker部署最新版JupyterHub
280人参与 • 2025-02-14 • 云虚拟主机
拉取镜像
docker pull jupyterhub/jupyterhub:latest
启动镜像
docker run -d -p 8000:8000 --name jupyterhub jupyterhub/jupyterhub:latest jupyterhub
进入容器
docker exec -it jupyterhub bash
生成jupyterhub的配置文件
jupyterhub --generate-config
# 有需要可以安装中文库,根据自己需求进行处理,本教程不对此步骤做详细说明
pip install jupyterlab-language-pack-zh-cn -i https://mirrors.aliyun.com/pypi/simple
更新依赖并安装vim
apt-get update && apt install vim -y
升级组件库
pip install jupyterhub --upgrade -i https://mirrors.aliyun.com/pypi/simple
pip install notebook --upgrade -i https://mirrors.aliyun.com/pypi/simple
创建用户
adduser jupyterhub
执行命令并输入密码,建议密码也设置为:jupyterhub,方便理解下面的步骤。
更改home目录权限
chmod -r 777 /home
检查home目录是否存在刚刚创建用户时对应需要生成的目录,若没有则手动创建。
cd /home
ll
# 若没有目录
mkdir jupyterhub
# 目录授权
chown jupyterhub:jupyterhub jupyterhub -r
更新配置文件
cd /srv/jupyterhub && vim jupyterhub_config.py
追加如下内容,切记是追加!!!
c.authenticator.allow_all = true
c.authenticator.allow_existing_users = true
c.authenticator.admin_users = {'jupyterhub'}  # 管理员用户
c.dummyauthenticator.password = "jupyterhub"  # 初始密码设置
c.jupyterhub.admin_access = true
c.localauthenticator.create_system_users=true
c.spawner.notebook_dir = '~'
c.spawner.default_url = '/lab'
c.spawner.args = ['--allow-root']
c.jupyterhub.services = [
    {
        'name': 'idle-culler',
        'command': ['python3', '-m', 'jupyterhub_idle_culler', '--timeout=3600'],
        'admin':true
    }
]
访问验证
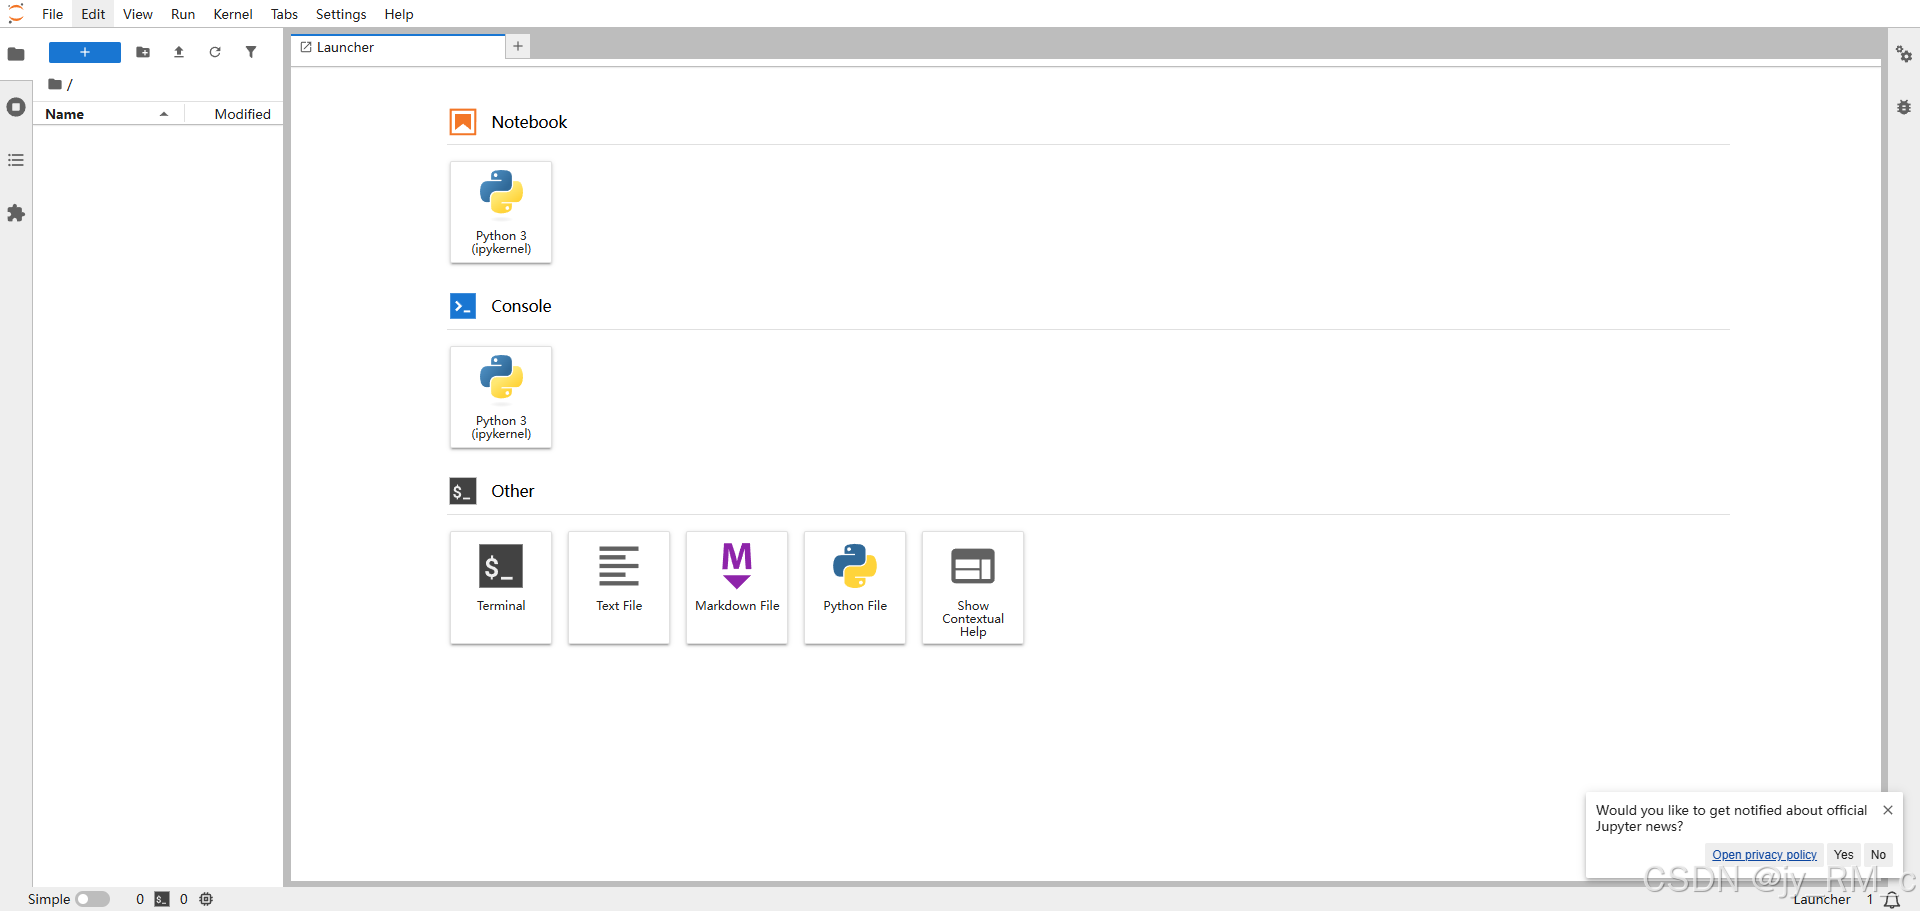
部署完毕后访问:http://[ip]:8000,例如:http://localhost:8000,输入配置文件中的用户名和密码。
效果如下:
到此这篇关于使用docker部署最新版jupyterhub的文章就介绍到这了,更多相关docker部署最新版jupyterhub内容请搜索代码网以前的文章或继续浏览下面的相关文章希望大家以后多多支持代码网!
赞 (0)
您想发表意见!!点此发布评论


发表评论