openwrt中taiscale自动安装脚本方式
235人参与 • 2025-03-03 • Redis
openwrt中taiscale自动安装脚本
一、代码仓库地址
https://github.com/adyanth/openwrt-tailscale-enabler
二、代码仓库中脚本文件详解
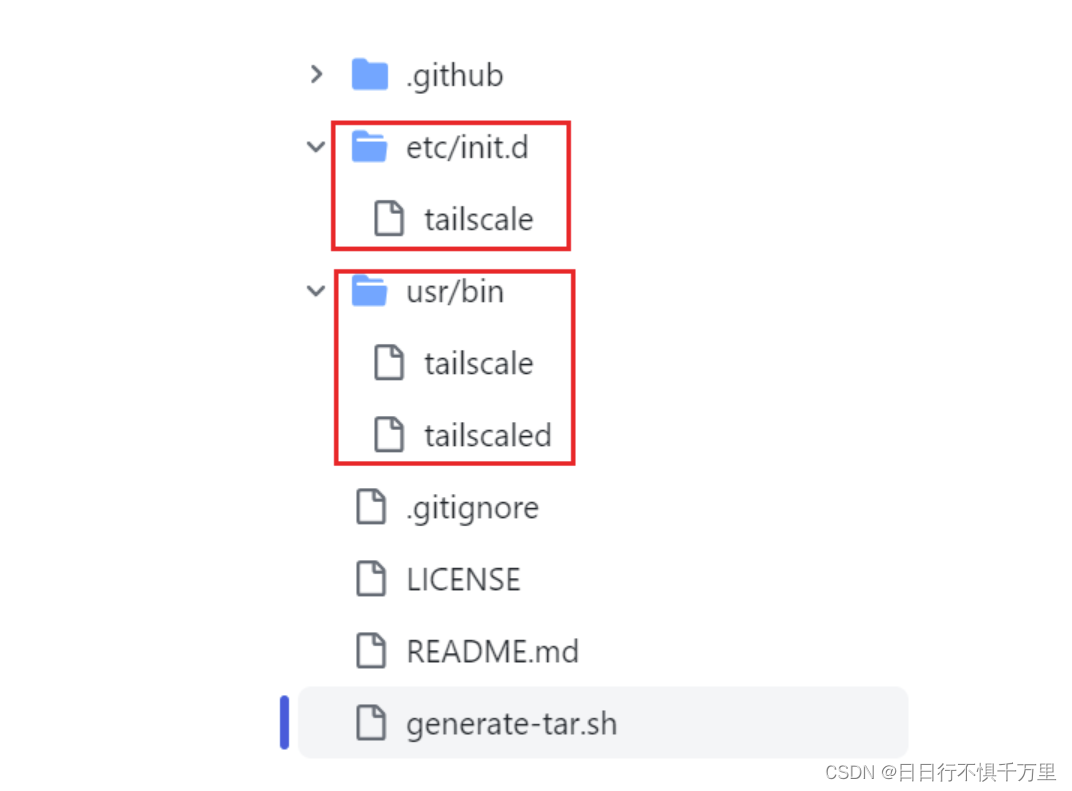
主要包含三个脚本分别是etc/init.d/tailscale、usr/bin/tailscale、usr/bin/tailscaled ,接下来逐个分析一下脚本中的具体内容:
1、etc/init.d/tailscale
这个脚本在 openwrt 系统初始化时执行,用于控制 tailscale 守护进程的启动和停止。
脚本具体内容如下:
#!/bin/sh /etc/rc.common

# 版权声明,表明脚本归 google llc 所有,使用 apache-2.0 许可。

use_procd=1  # 使用 procd,openwrt 的进程管理守护程序。
start=99     # 设置脚本启动的顺序,数字越大越后启动。
stop=1       # 设置脚本停止的顺序,数字越小越先停止。

# start_service 函数定义了服务启动时的行为。
start_service() {
  procd_open_instance  # 开启一个新的 procd 实例。
  procd_set_param command /usr/bin/tailscaled  # 设置要运行的命令(tailscale 守护进程)。

  # 设置 tailscale 监听 vpn 数据包的端口号。
  # 远程节点将自动获悉新端口号,但如果要设置外部防火墙规则,则可能需要配置此项。
  procd_append_param command --port 41641

  # openwrt 的 /var 是链接到 /tmp 的,所以将持久状态写到别的地方。
  procd_append_param command --state /etc/config/tailscaled.state

  # 为 tls 证书和 taildrop 持久化文件
  procd_append_param command --statedir /etc/tailscale/

  procd_set_param respawn  # 设置进程崩溃后自动重启。
  procd_set_param stdout 1 # 将标准输出重定向到系统日志。
  procd_set_param stderr 1 # 将标准错误输出也重定向到系统日志。

  procd_close_instance  # 关闭 procd 实例。
}

# stop_service 函数定义了服务停止时的行为。
stop_service() {
  /usr/bin/tailscaled --cleanup  # 执行 tailscale 守护进程的清理操作。
}
2、usr/bin/tailscale
这个脚本首先检测系统架构并下载适用于该架构的 tailscale 版本。它还确保下载最新版本的 tailscale。
脚本使用 wget 工具从 tailscale 官方网站下载 tar 压缩包,并将其解压到 /tmp 目录。最后,脚本尝试运行解压后的 tailscale 程序。
脚本具体内容如下:
#!/bin/sh

# 当脚本中的任何命令执行失败时,脚本将停止执行。
set -e

# 检查是否已有 /tmp/tailscale 文件,如果没有,则执行后续安装步骤。
if [ ! -f /tmp/tailscale ]; then
    # 获取当前系统的架构类型。
    arch=$(uname -m)
    # 对于 mips 架构,进一步确定是大端(be)还是小端(le)。
    if [ "$arch" == "mips" ]; then
        endianness=$(echo -n i | hexdump -o | awk '{ print (substr($2,6,1)=="1") ? "le" : ""; exit }')
    # 对于其他架构类型,进行名称调整以匹配 tailscale 的命名规则。
    elif [ "$arch" == "armv7l" ]; then
        arch=arm
    elif [ "$arch" == "aarch64" ]; then
        arch=arm64
    elif [ "$arch" == "x86_64" ]; then
        arch=amd64
    fi

    # 设置 tailscale 的默认版本号。
    tailscale_version="1.56.1"

    # 从 tailscale 的官方网站获取最新版本号。

    latest_version=$(wget -o- https://pkgs.tailscale.com/stable/ | grep tailscale_ | head -1 | cut -d'_' -f 2)
    # 如果最新版本号与默认版本号不同,则使用最新版本号。
    if [ "$tailscale_version" != "$latest_version" ]; then
        tailscale_version=$latest_version
    fi

    # 组合出完整的 tailscale 版本号。
    version="${tailscale_version}_${arch}${endianness}"

    # 显示下载信息。
    echo "downloading tailscale ${version} .."

    # 创建文件列表,用于指定 tar 命令解压哪些文件。
    echo -e "tailscale_${version}/tailscale" > /tmp/tailscale_${version}_files.txt

    # 如果 /tmp/tailscaled 文件不存在,则将其添加到文件列表中。
    if [ ! -f /tmp/tailscaled ]; then
        echo -e "tailscale_${version}/tailscaled" >> /tmp/tailscale_${version}_files.txt
    fi

    # 下载并解压 tailscale。
    wget -o- https://pkgs.tailscale.com/stable/tailscale_${version}.tgz | tar x -zvf - -c /tmp -t /tmp/tailscale_${version}_files.txt

    # 移动解压后的文件到 /tmp 目录,并清理不再需要的文件。
    mv /tmp/tailscale_$version/* /tmp
    rm -rf /tmp/tailscale_${version}*

    # 显示下载完成信息。
    echo "done!"
fi

# 运行 tailscale,传递任何给脚本的参数。
/tmp/tailscale "$@"
这句详细解释一下每个命令具体含义:
wget -o- https://pkgs.tailscale.com/stable/ | grep tailscale_ | head -1 | cut -d'_' -f 2
wget -o- https://pkgs.tailscale.com/stable/:
- 这个命令使用
wget从指定的 url 下载数据。 -o-参数指示wget将下载的内容输出到标准输出(stdout),而不是保存为文件。
| grep tailscale_:
- 通过管道(
|),将wget的输出传递给grep命令。 grep命令搜索包含 “tailscale_” 的文本行。
| head -1:
- 再次通过管道将
grep的输出传递给head命令。 head -1命令提取传入数据的第一行。
| cut -d'_' -f 2:
- 最后,将
head的输出传递给cut命令。 cut命令按照指定的分隔符(这里是下划线_)分割文本,并提取第二段文本(-f 2)。
3、usr/bin/tailscaled
这个脚本的主要作用是检查并下载最新版本的 tailscale,然后在 /tmp 目录下运行它。
脚本首先确定运行它的系统的架构类型,然后下载并解压适合该架构的 tailscale 版本。
如果 /tmp/tailscaled 文件已存在,脚本不会执行下载和安装步骤。
脚本具体内容如下:
#!/bin/sh

# 当任何语句的执行结果不是true时就退出脚本
set -e

# 检查/tmp/tailscaled文件是否存在,如果不存在,则执行后续的安装步骤
if [ ! -f /tmp/tailscaled ]; then
    # 获取系统的架构类型
    arch=$(uname -m)
    # 如果架构是mips,则进一步确定是大端(be)还是小端(le)
    if [ "$arch" == "mips" ]; then
        endianness=$(echo -n i | hexdump -o | awk '{ print (substr($2,6,1)=="1") ? "le" : ""; exit }')
    # 对于其他架构类型,进行名称调整以匹配 tailscale 的要求
    elif [ "$arch" == "armv7l" ]; then
        arch=arm
    elif [ "$arch" == "aarch64" ]; then
        arch=arm64
    elif [ "$arch" == "x86_64" ]; then
        arch=amd64
    fi

    # 设置 tailscale 的默认版本
    tailscale_version="1.56.1"

    # 从 tailscale 的官方网站获取最新版本号
    latest_version=$(wget -o- https://pkgs.tailscale.com/stable/ | grep tailscale_ | head -1 | cut -d'_' -f 2)
    # 如果最新版本号与默认版本号不同,则使用最新版本
    if [ "$tailscale_version" != "$latest_version" ]; then
        tailscale_version=$latest_version
    fi

    # 组合出完整的 tailscale 版本号
    version="${tailscale_version}_${arch}${endianness}"

    # 显示下载信息
    echo "downloading tailscale ${version} .."

    # 记录要下载的文件列表
    echo -e "tailscale_${version}/tailscaled" > /tmp/tailscale_${version}_files.txt

    # 从 tailscale 的官方网站下载并解压相应版本的 tailscale
    wget -o- https://pkgs.tailscale.com/stable/tailscale_${version}.tgz | tar x -zvf - -c /tmp -t /tmp/tailscale_${version}_files.txt

    # 移动解压后的文件并清理临时文件
    mv /tmp/tailscale_$version/* /tmp
    rm -rf /tmp/tailscale_${version}*

    # 显示下载完成信息
    echo "done!"
fi

# 执行 tailscale
/tmp/tailscaled "$@"
总结
以上为个人经验,希望能给大家一个参考,也希望大家多多支持代码网。
赞 (0)
您想发表意见!!点此发布评论


发表评论