ESLint的简单使用方法(js,ts,vue)
231人参与 • 2025-02-14 • Javascript
一、eslint介绍
1.为什么要用eslint
统一团队编码规范(命名,格式等)
统一语法
减少git不必要的提交
减少低级错误
在编译时检查语法,而不是等js引擎运行时才检查
2.eslint用法
可以手动下载配置
可以通过vue脚手架创建项目时自动下载
3.eslint包
安装方式:
通过npm直接进行全局安装npm i eslint -d
通过vue脚手架创建项目时选择安装eslint模块包vue create 创建项目时选择eslint安装的包
vscode中eslint扩展工具
二、手动下载配置(js)
1.创建一个测试文件夹:eslint-test
2.初始化项目:npm init -y(创建package.json)
3.直接在项目中安装eslint包npm i eslint -d
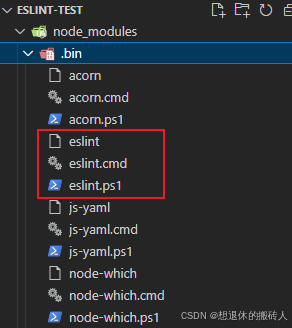
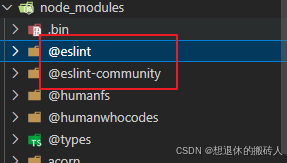
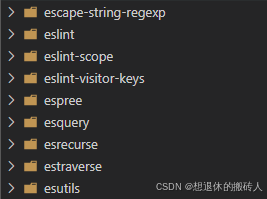
node_modules中下载了很多包,.bin/eslint.cmd脚本文件,内部通过nodejs执行eslint运行包的代码;@eslint包用来规范eslint配置文件;eslint开头的包是eslint运行包,包含eslint代码。
4.生成eslint配置文件
创建eslint.config.js文件
export default {
    rules: {
        "no-unused-vars": "error",
        "no-console": "error",
        "no-sparse-arrays": "error",
        "no-undef": "error",
        "no-unreachable": "error",
        "no-dupe-keys": "error"
    }
}
在package.json文件中添加type属性,添加命令
{
"name": "eslint-test",
"version": "1.0.0",
"main": "index.js",
"type": "module",
"scripts": {
"lint": "eslint ."
},
"keywords": [],
"author": "",
"license": "isc",
"description": "",
"dependencies": {
"eslint": "9.14.0"
}
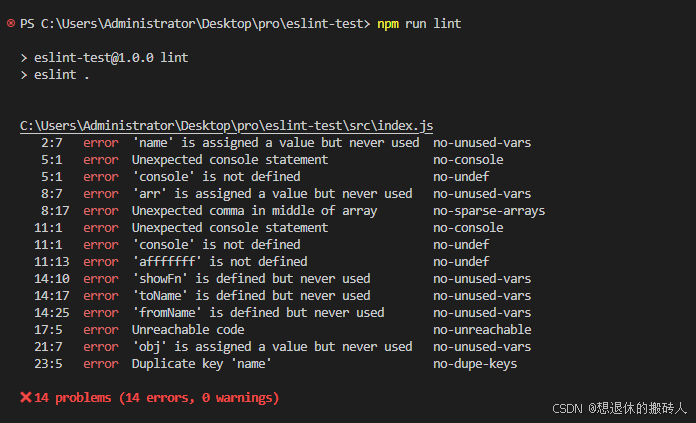
}创建js文件src/index.js
//不允许变量声明但没有使用no-unused-vars
const name = 'zs'

//不允许打印no-console
console.log('name');

//不允许数组中有空元素no-sparse-arrays
const arr = [1, , 3]

//不允许有未声明的变量no-undef
console.log(afffffff);

//不允许函数return后还有代码no-unreachable
function showfn(toname, fromname) {
    let a = 0;
    return a;
    a = 1
}

//不允许对象有重复的key,no-dupe-keys
const obj = {
    name: 'zs',
    name: 'zs1'
}
终端执行命令npm run lint规范代码
eslint可以创建独立的配置文件.eslintrc.js,也可以直接在package.json中配置
a.执行node_modules/.bin文件夹里的eslint脚本来创建配置文件
包含完整脚本路径的命令:'./node_modules/.bin/eslint --init'
也可以用npx来执行npxeslint --init
创建配置文件过程中,需要选择配置
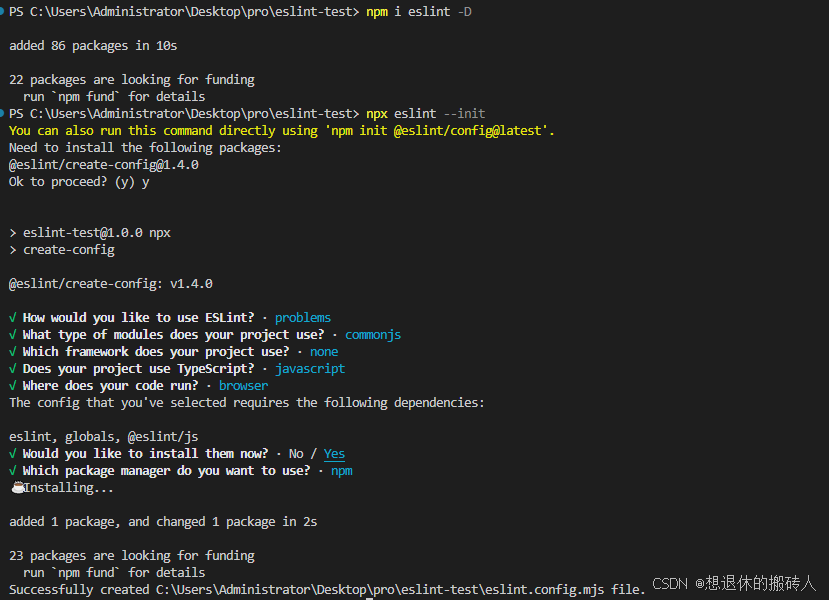
自动生成eslint.config.mjs文件
eslint.config.mjs
import globals from "globals";
import pluginjs from "@eslint/js";
/** @type {import('eslint').linter.config[]} */
export default [
{files: ["**/*.js"], languageoptions: {sourcetype: "commonjs"}},
{languageoptions: { globals: globals.browser }},
pluginjs.configs.recommended,
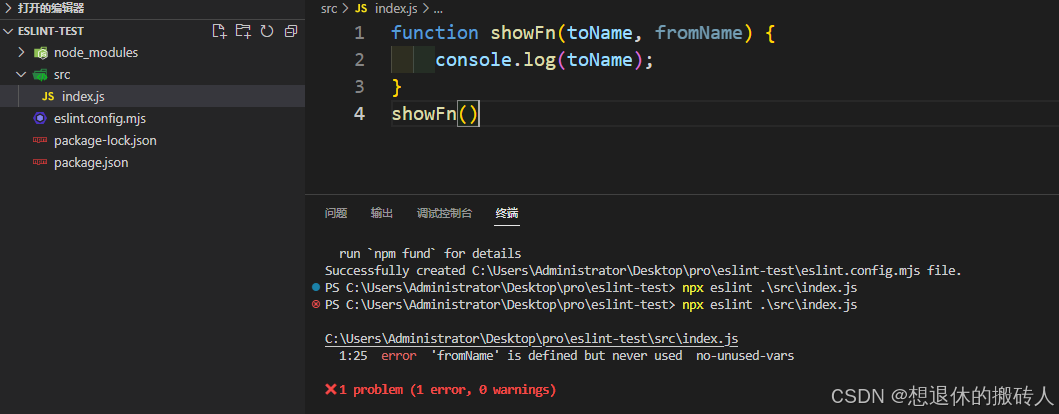
];创建js文件,输入npx eslint 文件名执行语法检查
5.规范集简化配置npm i@eslint/js
// export default {
//     rules: {
//         "no-unused-vars": "error",
//         "no-console": "error",
//         "no-sparse-arrays": "error",
//         "no-undef": "error",
//         "no-unreachable": "error",
//         "no-dupe-keys": "error"
//     }
// }
//规则集
import js from '@eslint/js'
export default [js.configs.recommended]
三、手动安装eslint(ts)
1.创建一个测试文件夹:eslint-ts-test
2.初始化项目:npm init -y(创建package.json)
3.直接在项目中安装eslint包npm i eslint @eslint/js @typescript-eslint/parser -d
{
    "name": "pro",
    "version": "1.0.0",
    "main": "index.js",
    "type": "module",
    "scripts": {
        "lint": "eslint ."
    },
    "keywords": [],
    "author": "",
    "license": "isc",
    "description": "",
    "devdependencies": {
        "@eslint/js": "9.14.0",
        "eslint": "9.14.0",
        "@typescript-eslint/parser": "8.14.0"
    }
}
4.新建配置文件eslint.config.js文件
import tspsrser from '@typescript-eslint/parser'

export default {
    //文件配置,哪些文件需要被校验,忽略eslint.config.js文件
    ignores: ["eslint.config.js"],
    files: ["**/*.ts"],
    //规范配置
    rules: {
        "no-unused-vars": "error",
        "no-console": "error"
    },
    //语言配置
    languageoptions: {
        //指定解析器
        parser: tspsrser
    }
}
5.创建ts文件,src/index.ts
const age=18
console.log(name)

/*ts类型定义
*ts相关的校验,eslint自带的校验espress解析器无法识别
*我们需要ts解析器来解析ts代码,完成类型校验
*/
interface uesr{
  name:string;
  age:number;
}
parsing error: the keyword 'interface' is reserved
ts相关的校验,eslint自带的校验espress解析器无法识别
我们需要ts解析器来解析ts代码,完成类型校验 npm i @typescript-eslint/parser
四、手动安装eslint(vue)
1.创建一个测试文件夹:eslint-ts-test
2.初始化项目:npm init -y(创建package.json)
3.直接在项目中安装eslint包npm i eslint @eslint/js @typescript-eslint/parser vue-eslint-parser -d
{
    "name": "eslint-test",
    "version": "1.0.0",
    "main": "index.js",
    "type": "module",
    "scripts": {
        "lint": "eslint ."
    },
    "keywords": [],
    "author": "",
    "license": "isc",
    "description": "",
    "dependencies": {
        "@eslint/js": "9.14.0",
        "@typescript-eslint/parser": "8.14.0",
        "eslint": "9.14.0",
        "vue-eslint-parser": "9.4.3"
    }
}
4.新建配置文件eslint.config.js文件
import tsparser from '@typescript-eslint/parser'
import vueparser from 'vue-eslint-parser'
export default {
ignores: ["eslint.config.js"],
files: ["**/*.ts", "**/*.vue"],
rules: {
"no-unused-vars": "error",
"no-console": "error",
"no-sparse-arrays": "error",
"no-undef": "error",
"no-unreachable": "error",
"no-dupe-keys": "error"
},
languageoptions: {
//指定解析器
parser: vueparser,
//解析器的语法parser设置
parseroptions: {
parser: tsparser
}
}
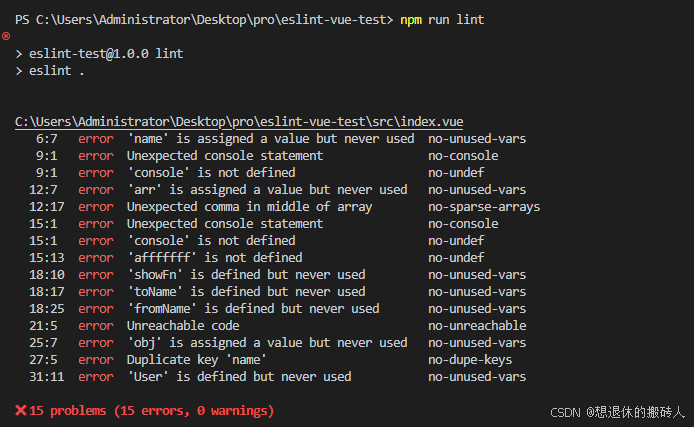
}5.创建vue文件,src/index.vue
<template>

</template>
<script setup lang="ts">
//不允许变量声明但没有使用no-unused-vars
const name = 'zs'

//不允许打印no-console
console.log('name');

//不允许数组中有空元素no-sparse-arrays
const arr = [1, , 3]

//不允许有未声明的变量no-undef
console.log(afffffff);

//不允许函数return后还有代码no-unreachable
function showfn(toname, fromname) {
    let a = 0;
    return a;
    a = 1
}

//不允许对象有重复的key,no-dupe-keys
const obj = {
    name: 'zs',
    name: 'zs1'
}

//类型定义
interface user{
  name:string;
  age:number;
}
</script>
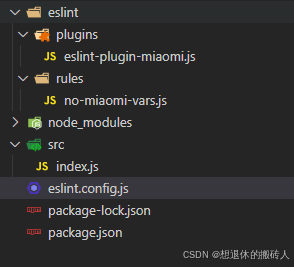
五、自定义插件
1.rule定义
针对这个规范的需求,编写一个rule,原理是通过ast节点处理来完成
//规则的本质是一个对象,
//eslint插件,必须长得像一个约定好的对象
export const nomiaomivars = {
    //插件的元信息
    meta: {
        messages: {
            nomiaomivars: "不允许使用miaomi变量"
        }
    },
    create(context) {
        return {
            //  这是一个访问者模式,访问到某一个ast的节点,就进行处理
            variabledeclaration(node) {
                console.log('variabledeclaration', node);
            },
            variabledeclarator(node) {
                console.log('variabledeclarator', node);
            },
            identifier(node) {
                console.log('identifier', node);
                if (node.name == 'miaomi') {
                    context.report({
                        node,
                        messageid: 'nomiaomivars',
                        data: {
                            name: node.name
                        }
                    })
                }
            },
            literal(node) {
                console.log('identifier', node);
            }
        }
    }
}
2.plugin插件定义
将rule进行插件化,提供给外部使用‘
import { nomiaomivars } from '../rules/no-miaomi-vars.js'
export const eslintmiaomiplugin = {
    rules: {
        "no-miaomi-vars": nomiaomivars
    }
}
3.use将插件引入到eslint配置文件中,使用插件
import tsparser from '@typescript-eslint/parser'
import vueparser from 'vue-eslint-parser'
import { eslintmiaomiplugin } from './eslint/plugins/eslint-plugin-miaomi.js'
export default {
    ignores: ["eslint.config.js"],
    files: ["src/**/*.js", "**/*.ts", "**/*.vue"],
    plugins: {
        miaomi: eslintmiaomiplugin //插件定义好后,插件名称就是规则的作用域
    },
    rules: {
        "miaomi/no-miaomi-vars": "error",
    },
    languageoptions: {
        //指定解析器
        parser: vueparser,
        //解析器的语法parser设置
        parseroptions: {
            parser: tsparser
        }
    }
}
总结
到此这篇关于eslint的简单使用的文章就介绍到这了,更多相关eslint简单使用内容请搜索代码网以前的文章或继续浏览下面的相关文章希望大家以后多多支持代码网!
赞 (0)
您想发表意见!!点此发布评论


发表评论