vue实现自定义颜色选择器
275人参与 • 2025-04-24 • Javascript
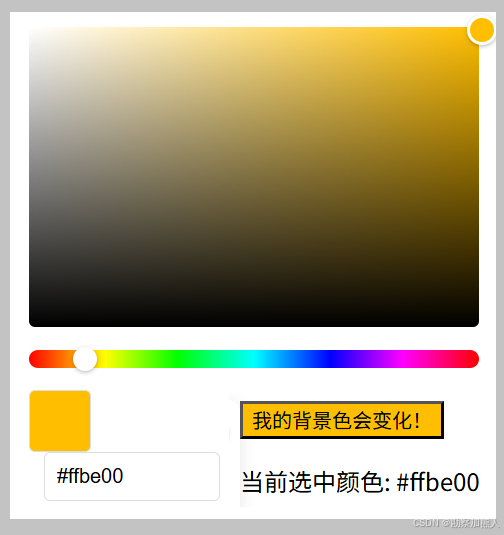
vue自定义颜色选择器
效果图:
step0: 默认写法 调用系统自带的颜色选择器
<input type="color">
step1:c:\users\wangrusheng\pycharmprojects\untitled18\src\views\home.vue
<template>
  <div class="container">
    <!-- 颜色选择器组件 -->
    <colorpicker v-model="selectedcolor" />

    <!-- 新增的动态背景按钮 -->
    <div>

    <button
      class="dynamic-button"
      :style="{ backgroundcolor: selectedcolor }"
    >
      我的背景色会变化!
    </button>

       <input type="color">

    <p>当前选中颜色: {{ selectedcolor }}</p>

    </div>
     </div>
</template>

<script>
import colorpicker from './colorpicker.vue'

export default {
  components: { colorpicker },
  data() {
    return {
      selectedcolor: '#ff0000' // 默认颜色
    }
  }
}
</script>
step2:c:\users\wangrusheng\pycharmprojects\untitled18\src\views\colorpicker.vue
<template>
  <div class="color-picker">
    <!-- 饱和度/明度选择区域 -->
    <div
      class="saturation"
      :style="{ backgroundcolor: `hsl(${hsv.h}, 100%, 50%)` }"
      @mousedown="startdrag"
    >
      <div
        class="selector"
        :style="{
          left: `${hsv.s * 100}%`,
          top: `${(1 - hsv.v) * 100}%`,
          backgroundcolor: currentcolor
        }"
      ></div>
    </div>

    <!-- 色相滑块 -->
    <div class="hue-slider" @mousedown="starthuedrag">
      <div
        class="hue-pointer"
        :style="{ left: `${(hsv.h / 360) * 100}%` }"
      ></div>
    </div>

    <!-- 颜色显示和输入 -->
    <div class="color-preview" :style="{ backgroundcolor: currentcolor }"></div>
    <input
      v-model="hexcolor"
      class="hex-input"
      placeholder="#ffffff"
      @input="handlehexinput"
    >
  </div>
</template>

<script>
export default {
  props: {
    modelvalue: string
  },
  emits: ['update:modelvalue'],
  data() {
    return {
      hsv: { h: 0, s: 1, v: 1 },
      hexcolor: '#ff0000',
      isdragging: false,
      ishuedragging: false
    }
  },
  computed: {
    currentcolor() {
      return this.hsvtohex(this.hsv)
    }
  },
  methods: {
    startdrag(e) {
      this.isdragging = true
      this.handledrag(e)
      window.addeventlistener('mousemove', this.handledrag)
      window.addeventlistener('mouseup', this.stopdrag)
    },
    starthuedrag(e) {
      this.ishuedragging = true
      this.handlehuedrag(e)
      window.addeventlistener('mousemove', this.handlehuedrag)
      window.addeventlistener('mouseup', this.stophuedrag)
    },
    handledrag(e) {
      if (!this.isdragging) return
      const rect = e.target.getboundingclientrect()
      const x = math.max(0, math.min(1, (e.clientx - rect.left) / rect.width))
      const y = math.max(0, math.min(1, (e.clienty - rect.top) / rect.height))

      this.hsv.s = x
      this.hsv.v = 1 - y
      this.updatehex()
    },
    handlehuedrag(e) {
      if (!this.ishuedragging) return
      const rect = e.target.getboundingclientrect()
      const x = math.max(0, math.min(1, (e.clientx - rect.left) / rect.width))
      this.hsv.h = x * 360
      this.updatehex()
    },
    stopdrag() {
      this.isdragging = false
      window.removeeventlistener('mousemove', this.handledrag)
      window.removeeventlistener('mouseup', this.stopdrag)
    },
    stophuedrag() {
      this.ishuedragging = false
      window.removeeventlistener('mousemove', this.handlehuedrag)
      window.removeeventlistener('mouseup', this.stophuedrag)
    },
    updatehex() {
      this.hexcolor = this.hsvtohex(this.hsv)
      this.$emit('update:modelvalue', this.hexcolor)
    },
    handlehexinput() {
      if (/^#([0-9a-f]{3}){1,2}$/i.test(this.hexcolor)) {
        this.hsv = this.hextohsv(this.hexcolor)
      }
    },
    // 颜色转换函数
    hsvtohex(hsv) {
      const h = hsv.h / 360
      let r, g, b

      const i = math.floor(h * 6)
      const f = h * 6 - i
      const p = hsv.v * (1 - hsv.s)
      const q = hsv.v * (1 - f * hsv.s)
      const t = hsv.v * (1 - (1 - f) * hsv.s)

      switch (i % 6) {
        case 0: r = hsv.v, g = t, b = p; break
        case 1: r = q, g = hsv.v, b = p; break
        case 2: r = p, g = hsv.v, b = t; break
        case 3: r = p, g = q, b = hsv.v; break
        case 4: r = t, g = p, b = hsv.v; break
        case 5: r = hsv.v, g = p, b = q; break
      }

      return `#${[r, g, b]
        .map(x => math.round(x * 255)
        .tostring(16)
        .padstart(2, '0'))
        .join('')}`
    },
    hextohsv(hex) {
      // 转换逻辑(此处省略具体实现)
      // 返回类似 {h: 0, s: 1, v: 1} 的hsv对象
    }
  }
}
</script>

<style>
.color-picker {
  width: 300px;
  padding: 20px;
  background: #fff;
  border-radius: 8px;
  box-shadow: 0 2px 10px rgba(0,0,0,0.1);
}

.saturation {
  position: relative;
  width: 100%;
  height: 200px;
  border-radius: 4px;
  background: linear-gradient(to top, #000, transparent),
              linear-gradient(to right, #fff, transparent);
}

.selector {
  position: absolute;
  width: 16px;
  height: 16px;
  border: 2px solid white;
  border-radius: 50%;
  transform: translate(-8px, -8px);
  box-shadow: 0 1px 3px rgba(0,0,0,0.3);
}

.hue-slider {
  position: relative;
  height: 12px;
  margin: 15px 0;
  background: linear-gradient(to right,
    #ff0000 0%,
    #ffff00 17%,
    #00ff00 33%,
    #00ffff 50%,
    #0000ff 67%,
    #ff00ff 83%,
    #ff0000 100%);
  border-radius: 6px;
}

.hue-pointer {
  position: absolute;
  width: 16px;
  height: 16px;
  background: white;
  border-radius: 50%;
  transform: translate(-8px, -2px);
  box-shadow: 0 1px 3px rgba(0,0,0,0.3);
}

.color-preview {
  width: 40px;
  height: 40px;
  border-radius: 4px;
  border: 1px solid #ddd;
}

.hex-input {
  margin-left: 10px;
  padding: 8px;
  width: 100px;
  border: 1px solid #ddd;
  border-radius: 4px;
}
</style>
到此这篇关于vue实现自定义颜色选择器的文章就介绍到这了,更多相关vue颜色选择器内容请搜索代码网以前的文章或继续浏览下面的相关文章希望大家以后多多支持代码网!
赞 (0)
您想发表意见!!点此发布评论


发表评论